 Program development > C# > WinForms > Content
C# label control, with winforms label transparent background, multiline text and alignment
The label control is automatically resized according to the text by default in Winforms. You cannot set its width and height freely. No matter how you modify its width and height, it will change back to the original value. Can't the size of the label control be customized? Of course not. You need to set a property of the label control before you can customize the width and height of it.
After defining the width and height of the label control, the text is displayed in the upper-left corner of it by default. What should I do if I want to center it? This also requires setting a label property. In addition, you can set the text to wrap automatically, the background is transparent, and import pictures.
I, Custom C# label control size(width and height)
1. Select label control to open the "Properties" dialog box on the right. If there is no "Properties" on the right, select "View" menu → Properties(Or right-click on the label and select "Properties"), as shown in Figure 1:
Figure 1
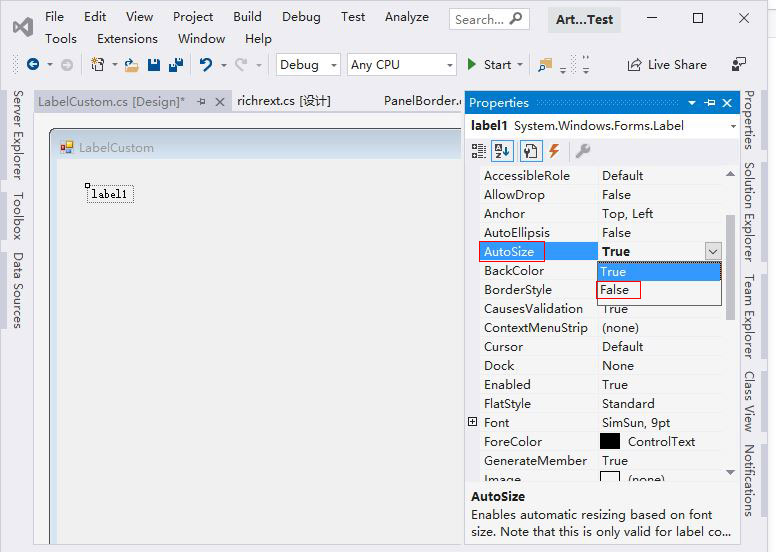
2. Find the AutoSize property, click the drop-down box to its right, and select False, that is, set the label control to not automatically increase the width and height, so that it can be customized size, as shown in Figure 2:
Figure 2
3. You can either drag the small square on the border of the label control to customize its size, or set the Size property of it. Customizing the C# label control size is still very simple, just change the properties.
II, C# label control text alignment
Generally, you need to set the text alignment of label control after customizing its size(width and height). The setting steps are as follows:
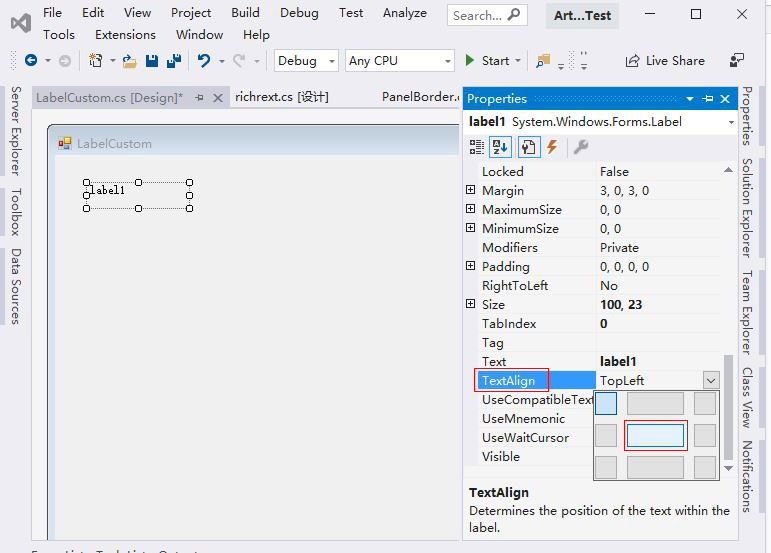
1. Select the label control, open the Properties dialog bix on the right as you defined the size of it above, and find the TextAlign property, as shown in Figure 3:
Figure 3
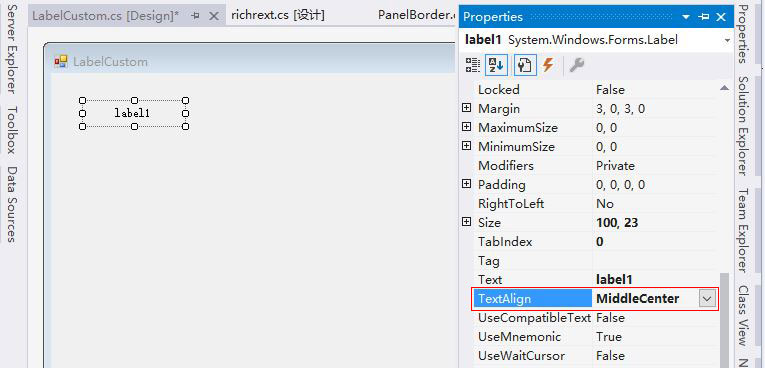
2. Click the drop-down box to the right of TextAlign and select the middle rectangle(i.e MiddleCenter), the text of label control is vertically centered, as shown in Figure 4:
Figure 4
3. TextAlign has a total of 9 alignment methods, respectively
TopLeft: Content is vertically aligned at the top, and horizontally aligned on the left; the square in the top left corner in Figure 3;
TopCenter: Content is vertically aligned at the top, and horizontally aligned at the center; the middle rectangle on the top of Figure 3;
TopRight: Content is vertically aligned at the top, and horizontally aligned on the right; the square in the upper right corner of Figure 3;
MiddleLeft: Content is vertically aligned in the middle, and horizontally aligned on the left; the square in the left middle in Figure 3;
MiddleCenter: Content is vertically aligned in the middle, and horizontally aligned at the center; the rectangle in the middle of Figure 3;
MiddleRight: Content is vertically aligned in the middle, and horizontally aligned on the right; the square in the right middle in Figure 3;
BottomLeft: Content is vertically aligned at the bottom, and horizontally aligned on the left; the square in the bottom left corner in Figure 3;
BottomCenter: Content is vertically aligned at the bottom, and horizontally aligned at the center; the rectangle at the bottom of Figure 3;
BottomRight: Content is vertically aligned at the bottom, and horizontally aligned on the right; the square in the bottom right corner of Figure 3;
III, How to display multiline text in a label control c#
If you put Label control directly into the Form, it will not wrap automatically, but if you put it in Panel, as long as its AutoSize property is set to False, it will wrap automatically; the method is:
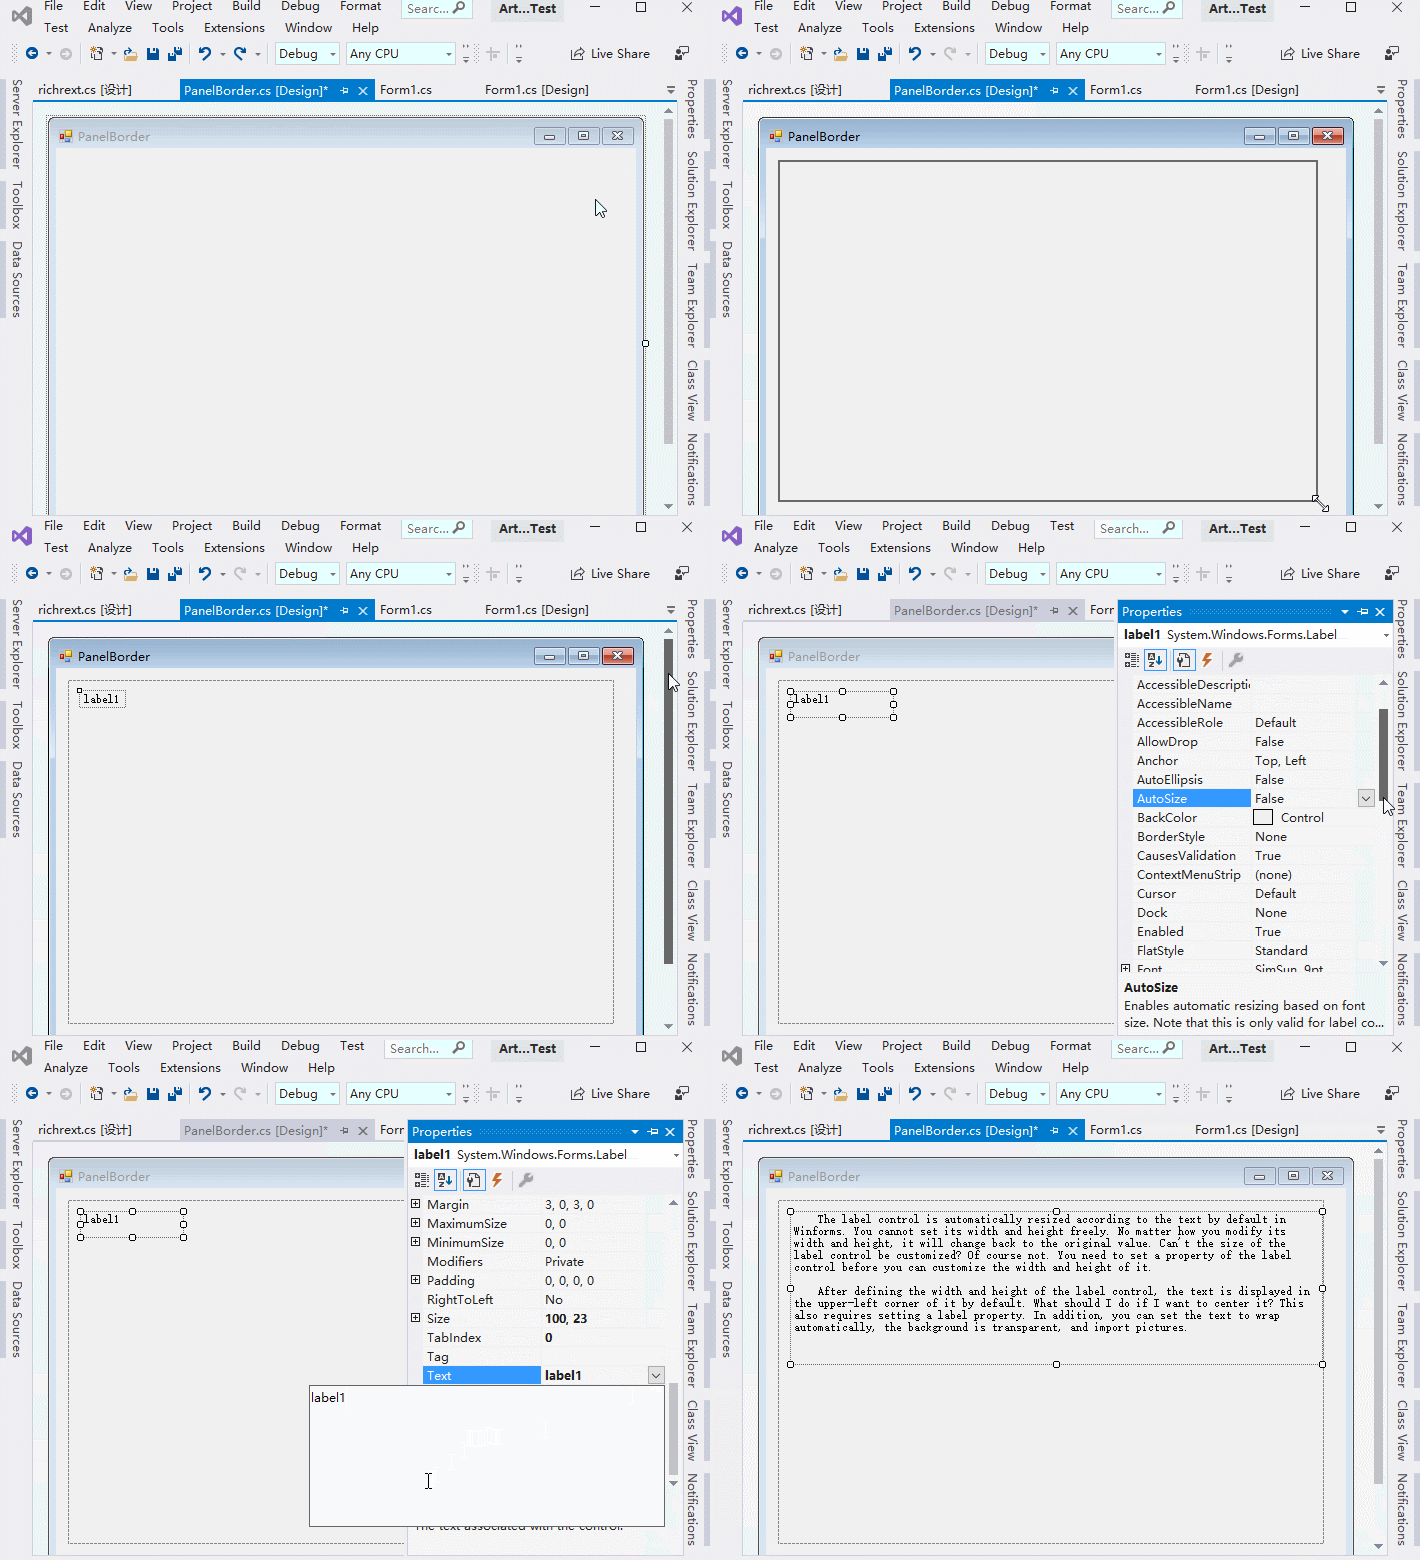
1. Click "Toolbox" on the left side of the window. In the pop-up menu, move the mouse to Panel, hold down the left button and drag it to the Form, release the left button to create a Panel; move the mouse to the icon with four arrows in the upper left corner of Panel, press and hold the left button to move it to the upper left corner of the window; then move the mouse to the bottom right corner of the Panel. When the mouse changes to an icon with a double arrow, press and hold the left button and drag to the bottom right corner until the Panel is the right size.
2. In the same way, drag a Label control to the Panel and move it to the upper left corner of the Panel. Click "Properties" on the right side of the window. In the expanded dialog box, set AutoSize to False; click on the right side of Text property and click down arrow icon", press Ctrl + A to select "label1", paste the text into, click the label control in the Form, and then adjust the label control to a suitable size. The operation steps are shown in Figure 5:
Figure 5
Hint: If AutoSize is set to False and Dock is set to Fill, then AutoSize is set to True again. Even if AutoSize is set to False and Dock is set to None, the text will not wrap automatically. You need to set Dock to Fill.
Spacing(line height) problem of Label control: If labels are used to display multiple lines of text. The spacing cannot be adjusted. Up and down texts are close together, it is not beautiful. You can replace it with RichTextBox control, Its background is set to be the same as the background of the control(such as a Form), and then the border is set to None and ReadOnly is set to True. If you must use Label control, you need to redraw.
IV, C# Winforms label transparent background
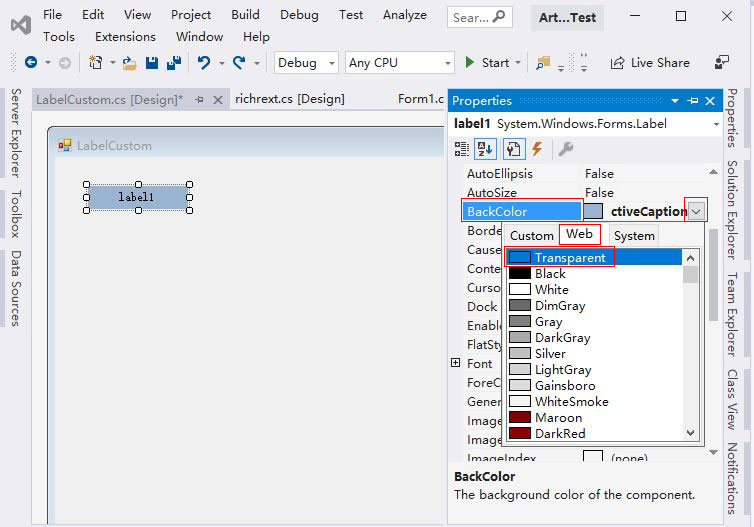
1. Select the label control you want to set, expand the Properties dialog box on the right, find the BackColor property, click the drop-down box to its right, and select the "Web tab → Transparent", as shown in Figure 6:
Figure 6
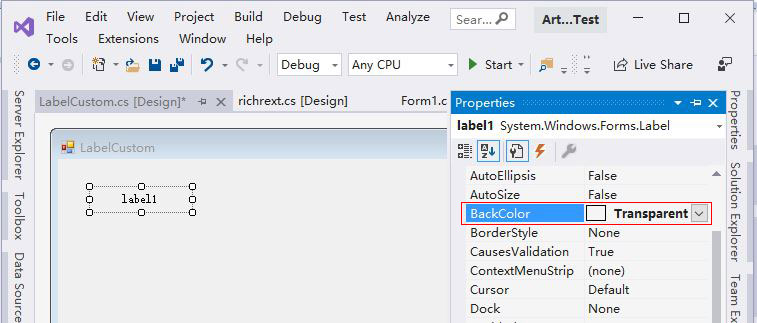
2. At this point, the label control is transparent, as shown in Figure 7:
Figure 7
V, Add image to label in winforms
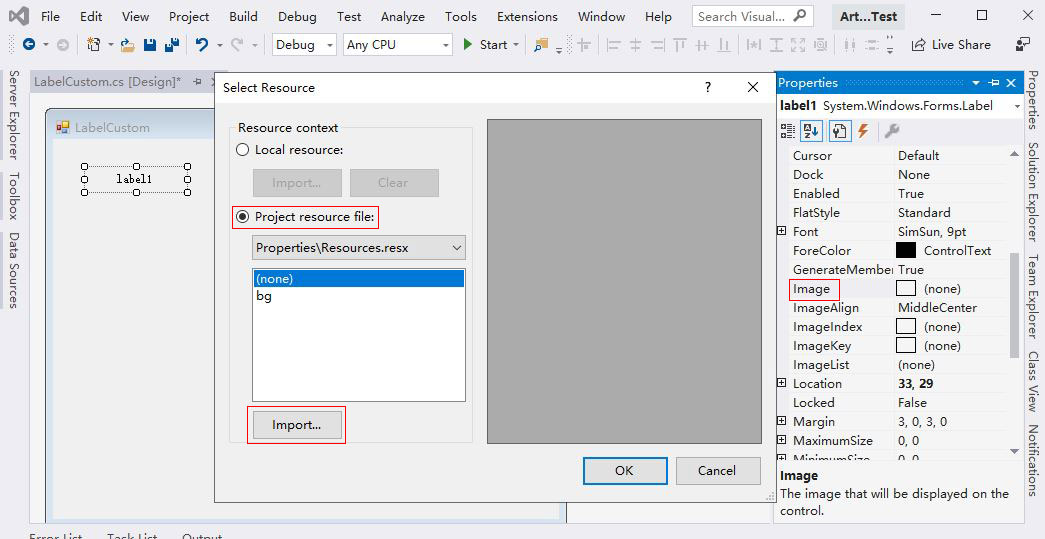
1. Right-click the Label control, select "Properties" in the pop-up menu, find Image property in the dialog box that opens, click it once, and then click the "icon with ..." to open the "Select Resource" dialog box, as shown in Figure 8:
Figure 8
2. Select "Project resource file" so that the picture is included when you publish; click "Import" and navigate to the folder where the picture is located and import it. Align of image is the same as align of its text. There are nine types. MiddleCenter is selected by default.
