 Program development > C# > Content
Visual Studio create new project and solution for existing project, with net core and Javascript
Visual Studio can create a single independent website, application and class library, or create a solution to include them to facilitate management and improve the used efficiency of program. So Visual Studio create new project, how to do? (Take Visual Studio 2005 and 2019 as examples, other versions are the same)
I. How to create a project in Visual Studio 2019
1) How to create a new project in Visual Studio 2019(How to create net core project in Visual Studio)
1. Select "File → New → Project" in turn(or press Ctrl + Shift + N), open the "Create a new project" dialog box, as shown in Figure 1:
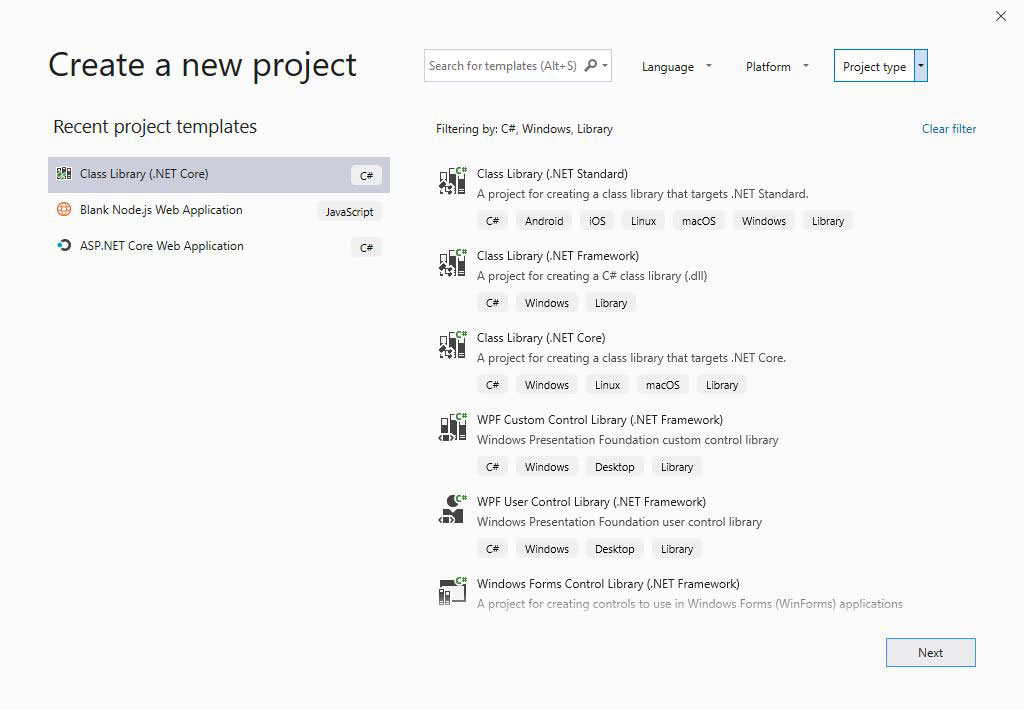
Figure 1
Tip: When you start Visual Studio 2019, you will first enter the navigation window(as shown in Figure 2). Click "Create a new project" to open the "Create a new project" dialog box.
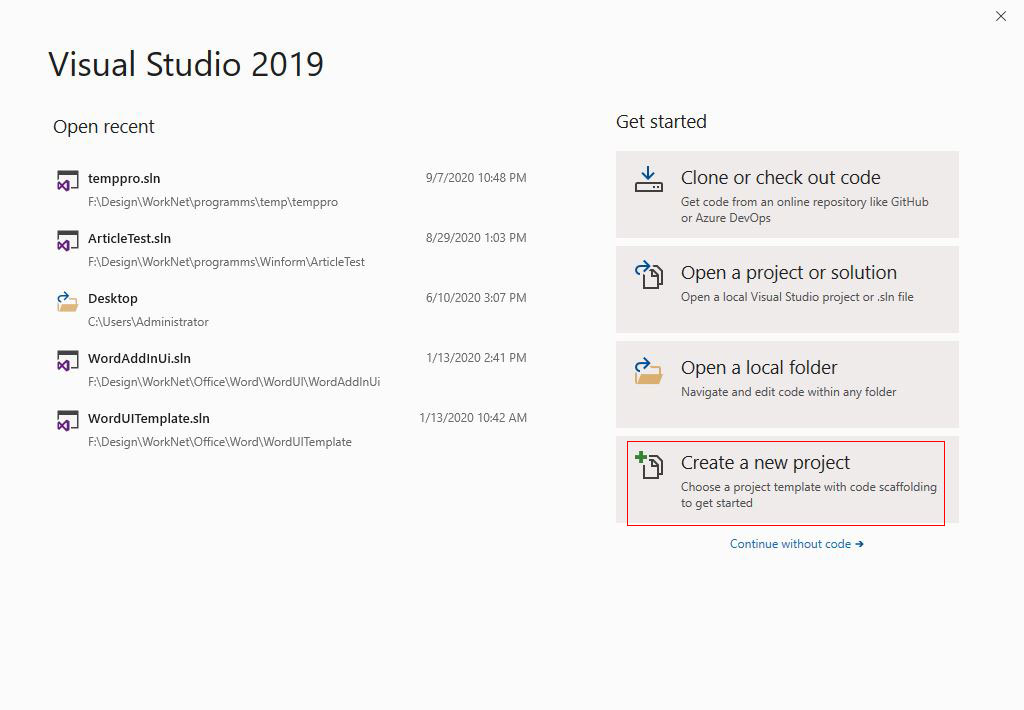
Figure 2
2. Click the "Language" drop-down list box, select a language from the pop-up options, such as C#; select a "platform"(such as Windows) and "project type"(Web) in the same way; and select the one you want to create applications, such as "ASP.NET Core Web Application", as shown in Figure 3:
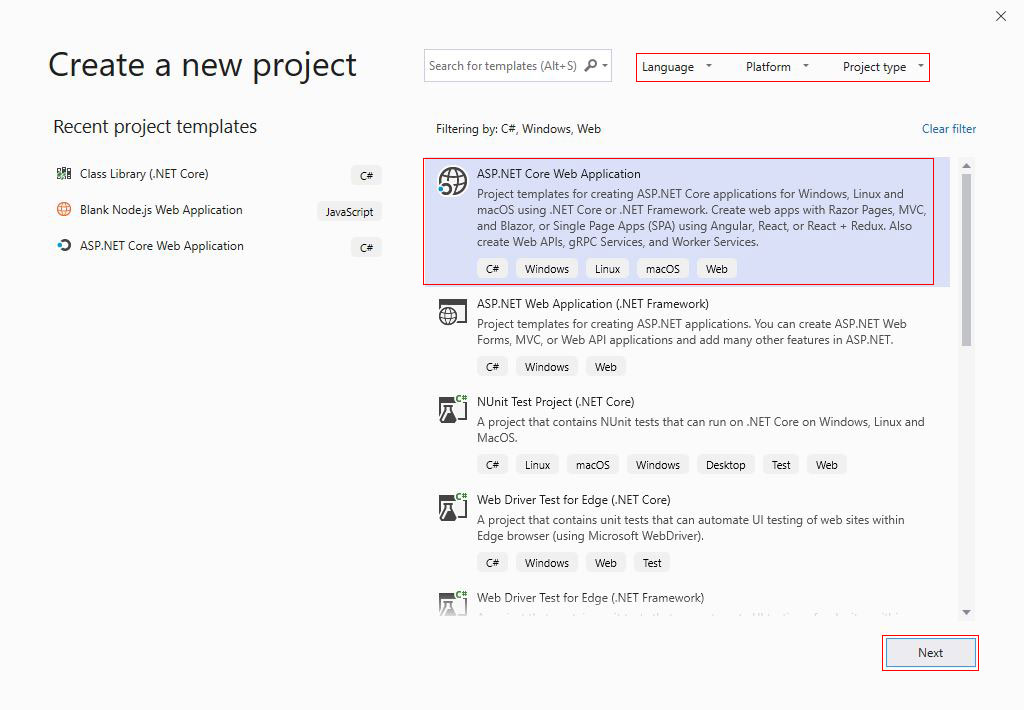
Figure 3
3. Click "Next", enter the "Configure your new project" dialog box, enter the "Project name", such as WebSite; click the "..." button, locate the directory for saving the project in the opened dialog box, select a folder under this directory, such as F:\Design\WorkNet; as shown in Figure 4:
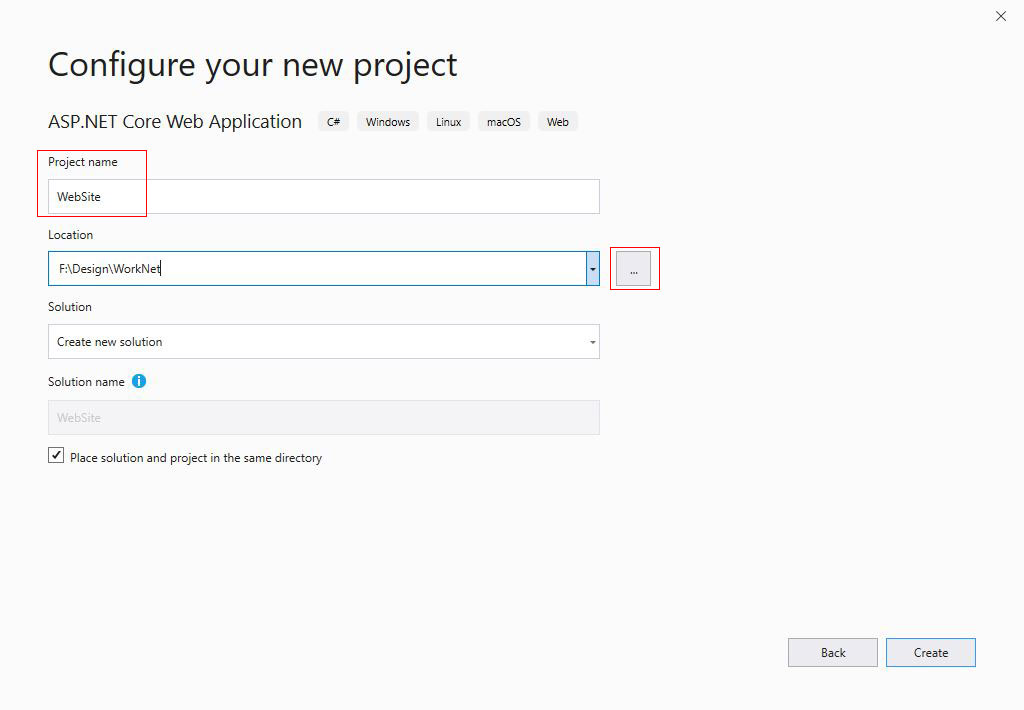
Figure 4
4. Click "Create" to enter the "Create a new ASP.NET Core Web Application" dialog box, select "Empty"(as shown in Figure 5), click "Create", then start to create, after a while, the creation is complete.
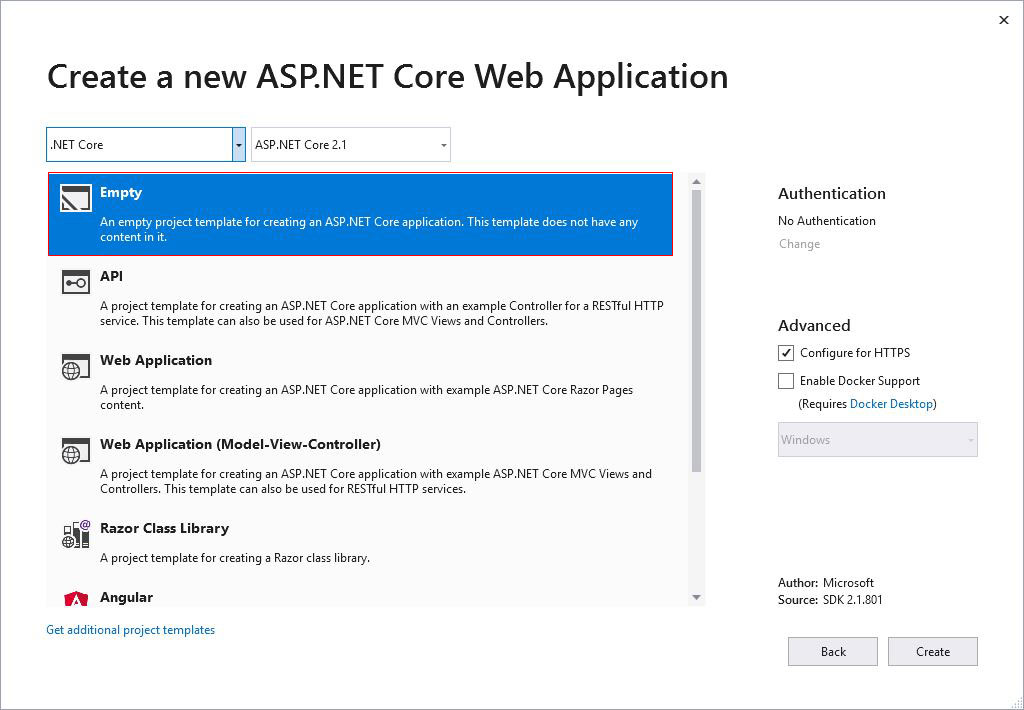
Figure 5
Tip: If you want to generate a example of web page, you can select "Web Application". In addition to choosing ".NET Core" for "Framework", you can choose ".NET Framework", and ".NET Core" can be cross-platform.
2) Visual Studio create new solution for existing project
1. Create a solution matching the existing project type according to the above method, and then add the project to the solution, the method is:
1) Right-click "Solution" and select "Add → Existing Project" in the pop-up menu, as shown in Figure 6:
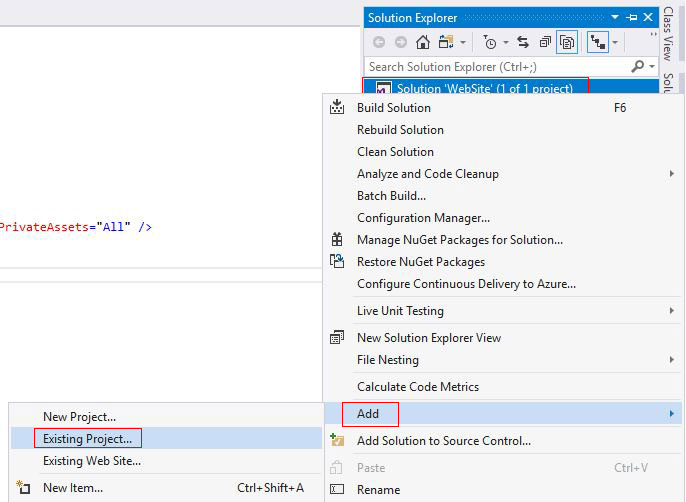
Figure 6
2) Open the "Add Existing Project" dialog box, locate the folder where the project is located, and double-click the project file(the file with the extension .csproj), as shown in Figure 7:
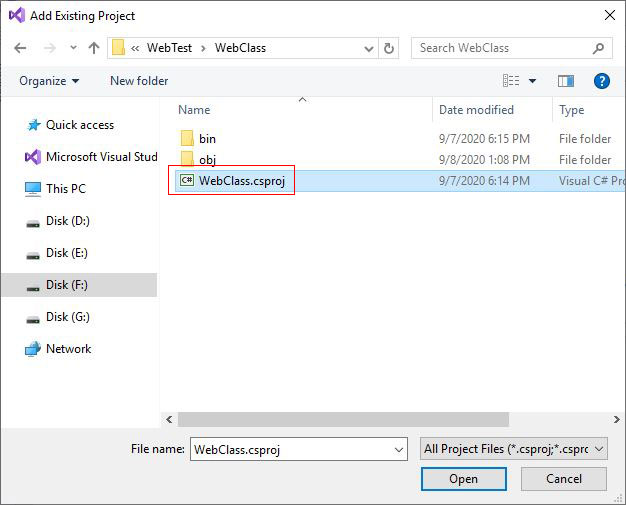
Figure 7
3) The project is added to the "solution", as shown in Figure 8:
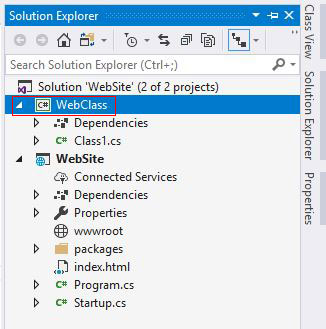
Figure 8
2. How to set the added project as the startup project? Right-click "Solution" and select "Set as Startup Project" in the pop-up menu, as shown in Figure 9:
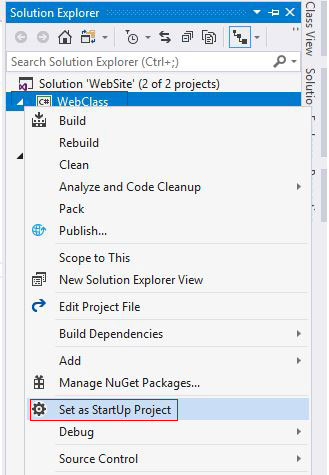
Figure 9
3) How to create Javascript project in Visual Studio 2019
1. Select "File → New → Project" in turn(or press Ctrl + Shift + N) to open the "Create a new project" dialog box. Select "JavaScript" for "Language", "Windows" for "Platform", and "Web" for "Project Type"; select a project you want to create, such as "Blank Node.js Web Application", as shown in Figure 10:
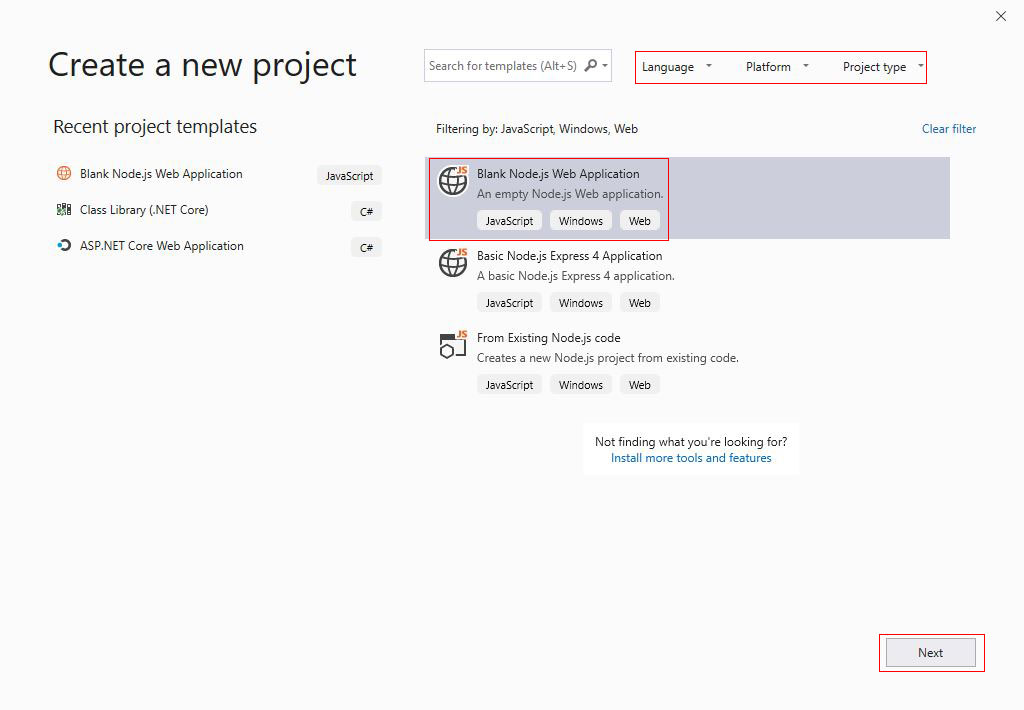
Figure 10
2. Click "Next", enter the "Configure your new project" dialog box, enter the "Project name", such as "JsClass"; click the "..." button, select a folder for saving the project, such as F:\Design\WorkNet\WebTest, as shown in Figure 11:
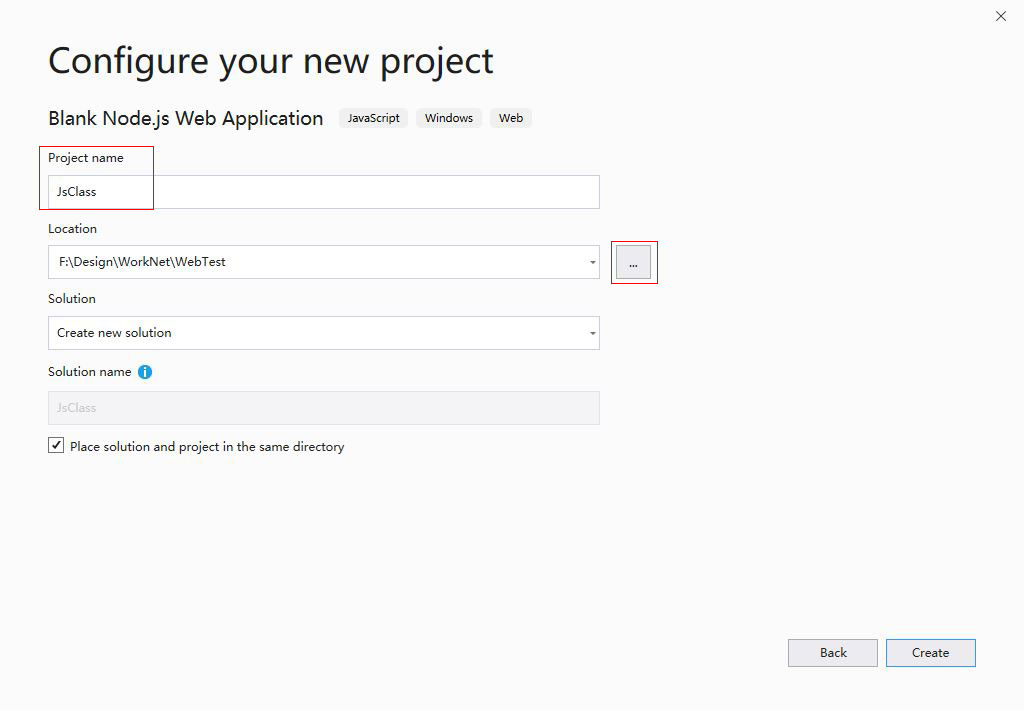
Figure 11
3. Click "Create" to start creating, and the creation will be completed after a while, as shown in Figure 12:
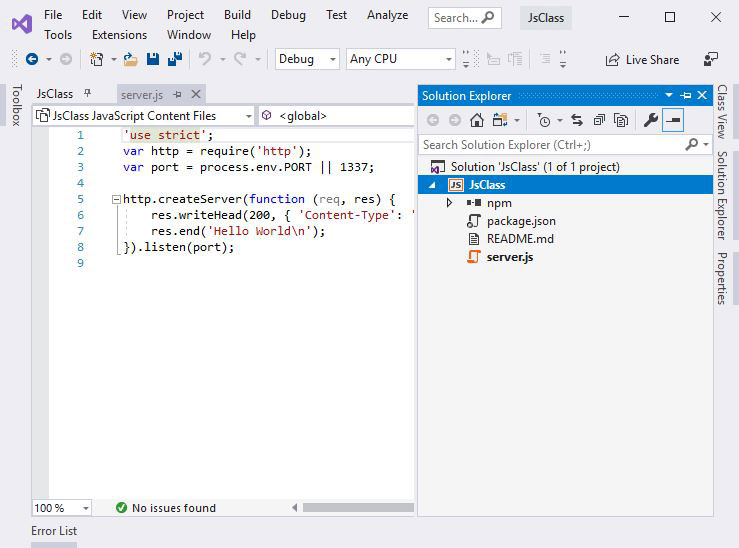
Figure 12
II. How to create a project in Visual Studio 2015
1. If it is Visual Studio 2005, you also need to install Visual Studio 2005 Service Pack 1(SP1), otherwise the project cannot be created; Visual Studio 2008 and above can be created directly.
2. Select "File → New → Project" in turn, open the "New Project" dialog box.
3. Select "Visual C#" under "Project Type" on the left, and then select "ASP.Net Web Application" on the right.
4. Enter the name of Web application on the right of "Name", for example, enter "ShopWeb"; "Location" is the directory where the project is to be saved, just select a directory by yourself, for example, the "G:\Design\"; "Solution Name" is the name of project, which can be the same as or different from the Web application, enter a name, such as "ShopApp".
5. After the names are determined, click "OK", successfully create a project.
Reminder:
After the project is created, there is only one Web application. You can either add an existing class library or create a new class library. If you are adding an existing class library, just right-click on the "Solution" on the right of Visual Studio 2005, select "Add → Existing Project", find the existing project, and add it.
If you are creating a new class library, just right-click on the "solution" on the right, select "Add → New Project", open the "New Project" window, select the "Class Library" on the right, and click "OK".
-
Related Reading
- C# gridview checkbox cannot get value(reason and sol
- Visual Studio project file is unloaded, cannot be op
- Open the solution and Visual Studio expands all proj
- How to solve shockwave flash player keeps crashing i
- Visual studio change curly brace style(highlight bra
- Change Visual Studio default encoding and how to dis
- Show line number Visual Studio(Applicable to all ver
- How to reset Visual Studio to default settings in tw
- Index was outside the bounds of the array in C# and