How to set cell formatting in Word (width, vertical alignment, margins, spacing)
Cell formatting includes Width, Alignment, Margins, Spacing, Wrap text, Fit text, Text direction, and more in Word. There are two units of measurement for the width of cells, namely inches and percentages. You must specify a specific length for the former, and the latter represents the percentage of the table width. If the table needs to adapt to different widths, the percentage can be used. The Alignment is the same as ordinary text or paragraph; the Margin refers to the distance between the text in the cell and the four sides of the cell; the Spacing refers to the distance between the cell and cell, which is generally not set; Wrap text refers to the number of characters exceeding the width of cell, whether it allows automatic line wrapping; Fit text means that the text remains unchanged no matter how the cell size is increased, that is, the text is continuously compressed; the Text direction is used to set the text direction in the cell.
I. How to set Width and Alignment of Cell in Word
1. Right-click the cell you want to set, such as the first cell in the second row, select Table Properties in the pop-up menu, open the Table Properties dialog box, and select the Cell tab, as shown in Figure 1 :
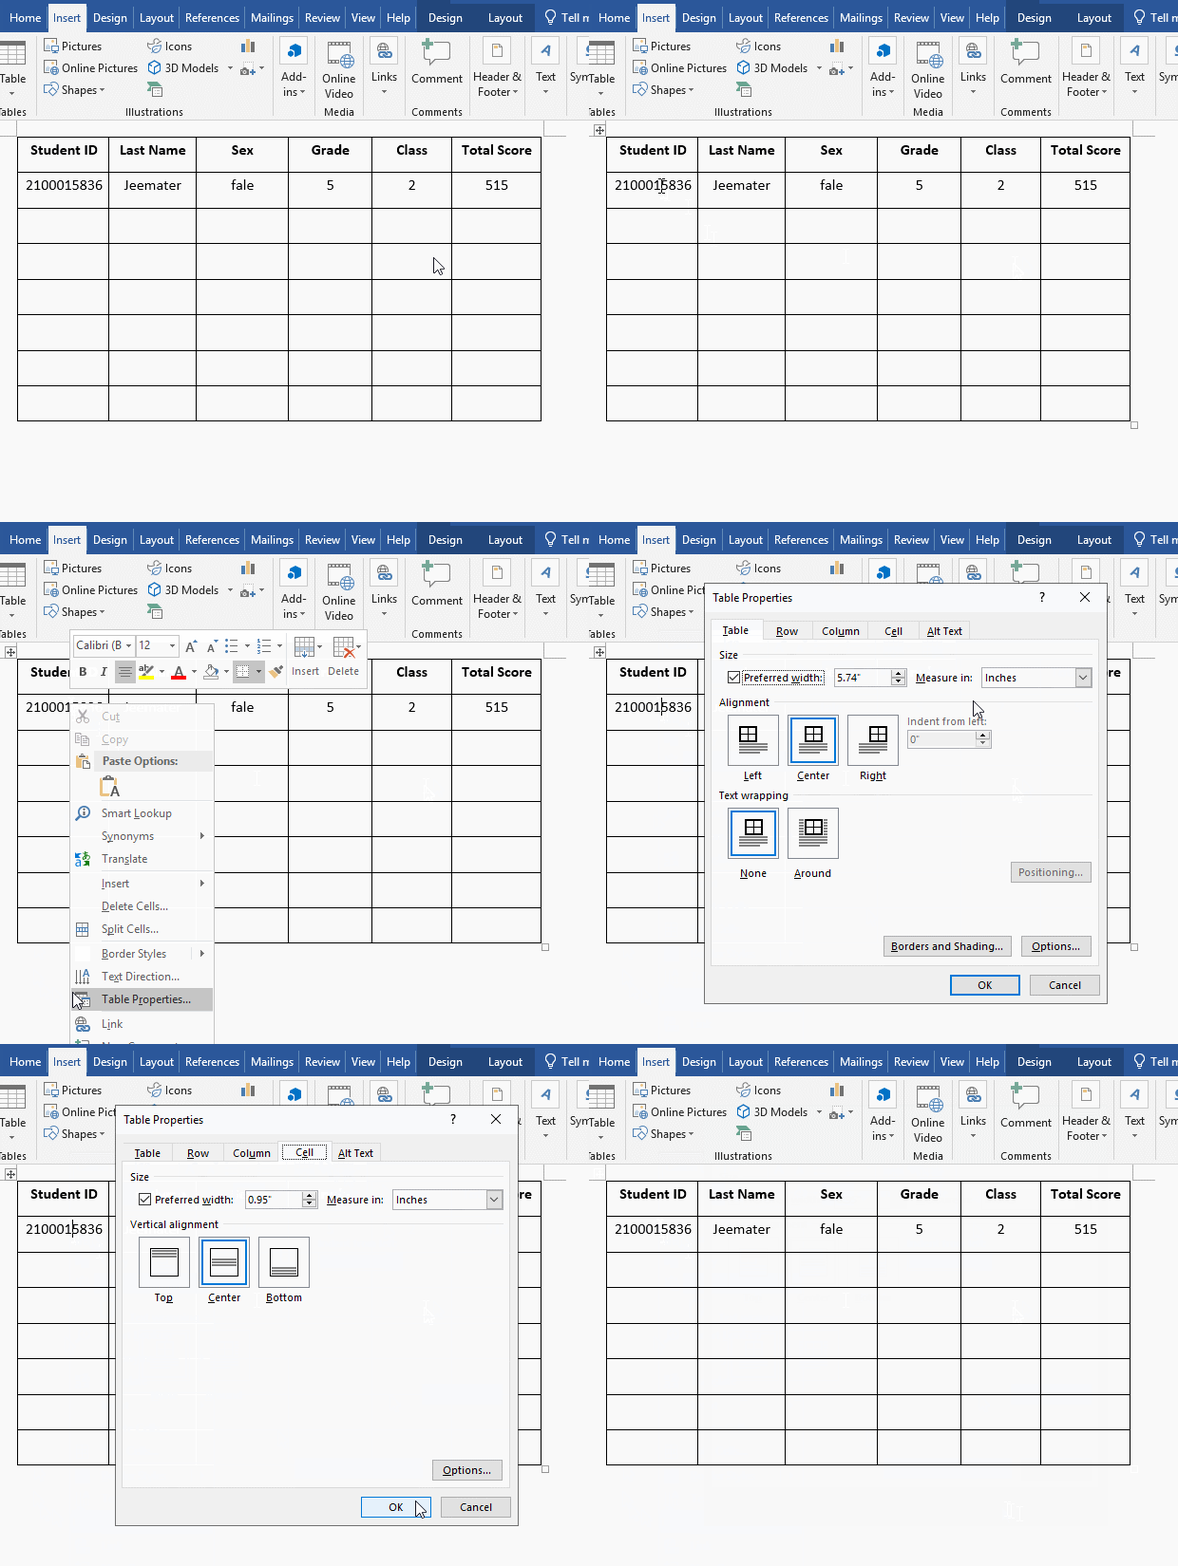
Figure 1
2. The current cell uses the specified width, which is 0.95"; if you want to adjust its width, you can either directly input the specific value, or click the two small black arrows on the right side of the input box to adjust. It has been introduced in the previous row and column height and width settings. Now change the unit of measurement, select Percent, 0.95" is 16.6% of the width of the table, as shown in Figure 2:
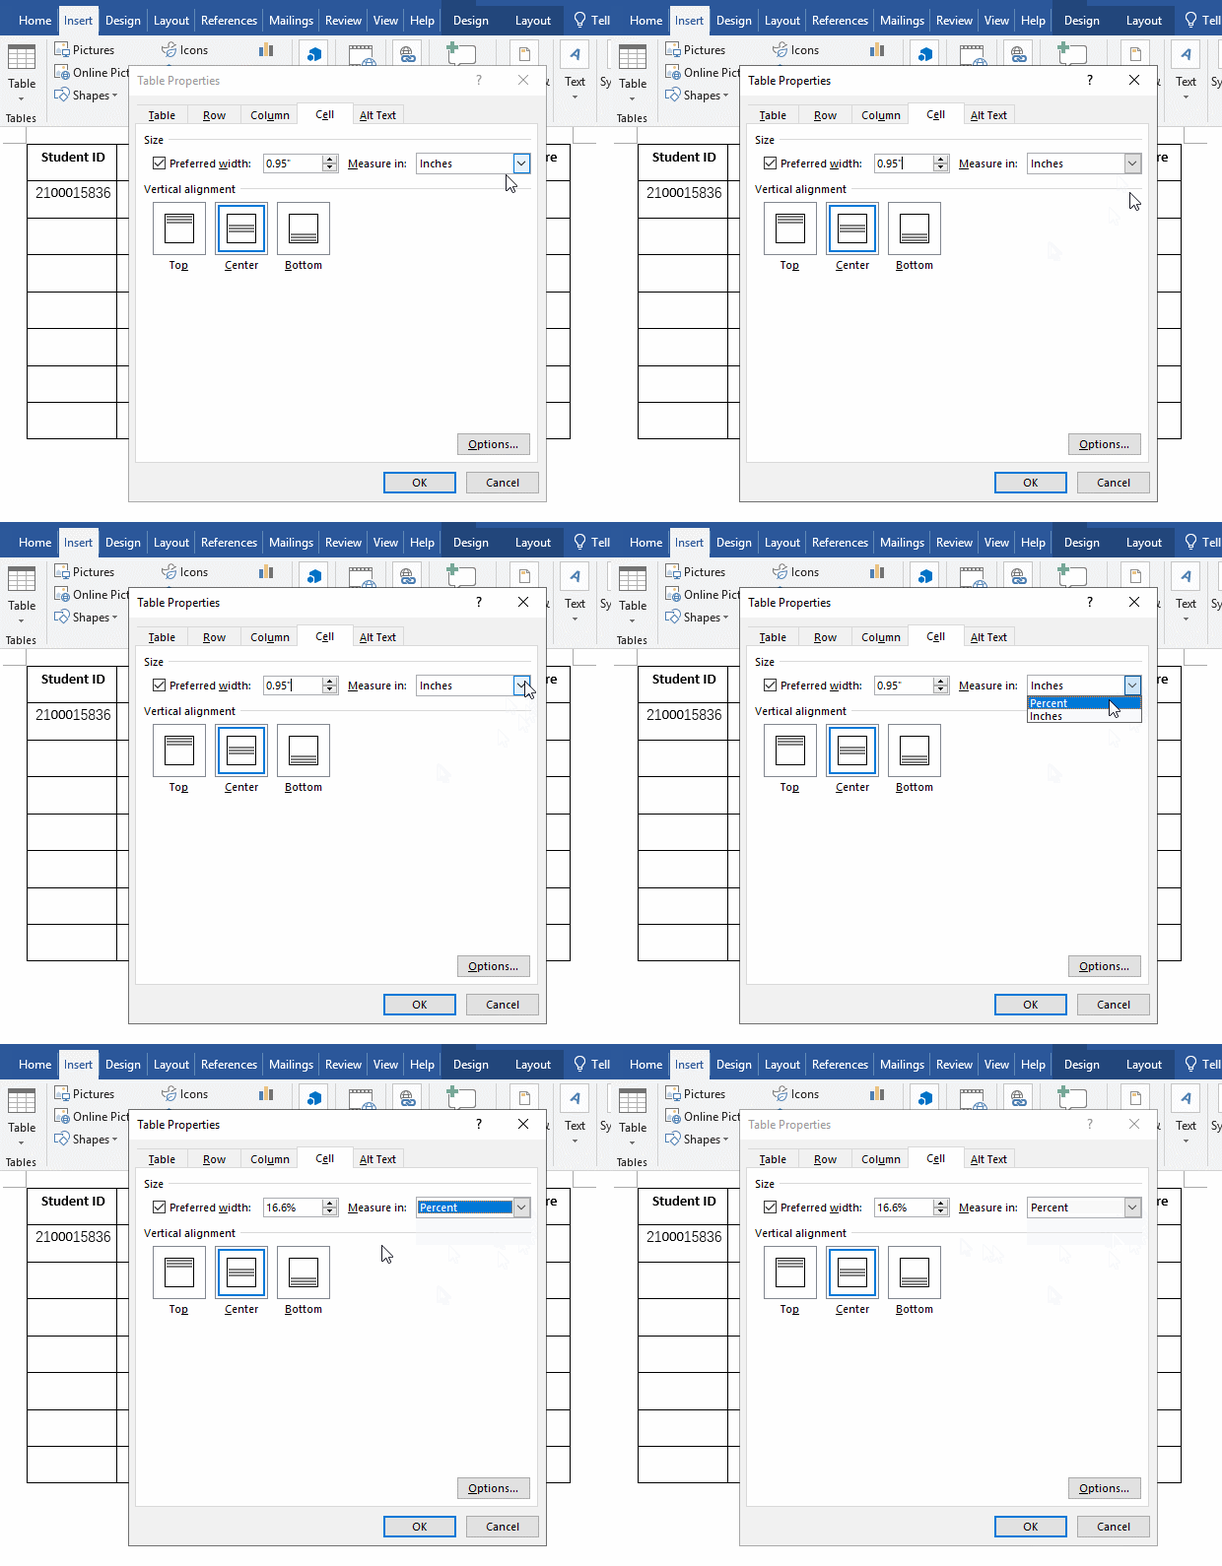
Figure 2
3. Below the width setting is the Vertical Alignment of the cell, the default is Top, but we have selected the Center, you can select Top or Bottom, select Bottom, and click OK, the effect is as shown in Figure 3:
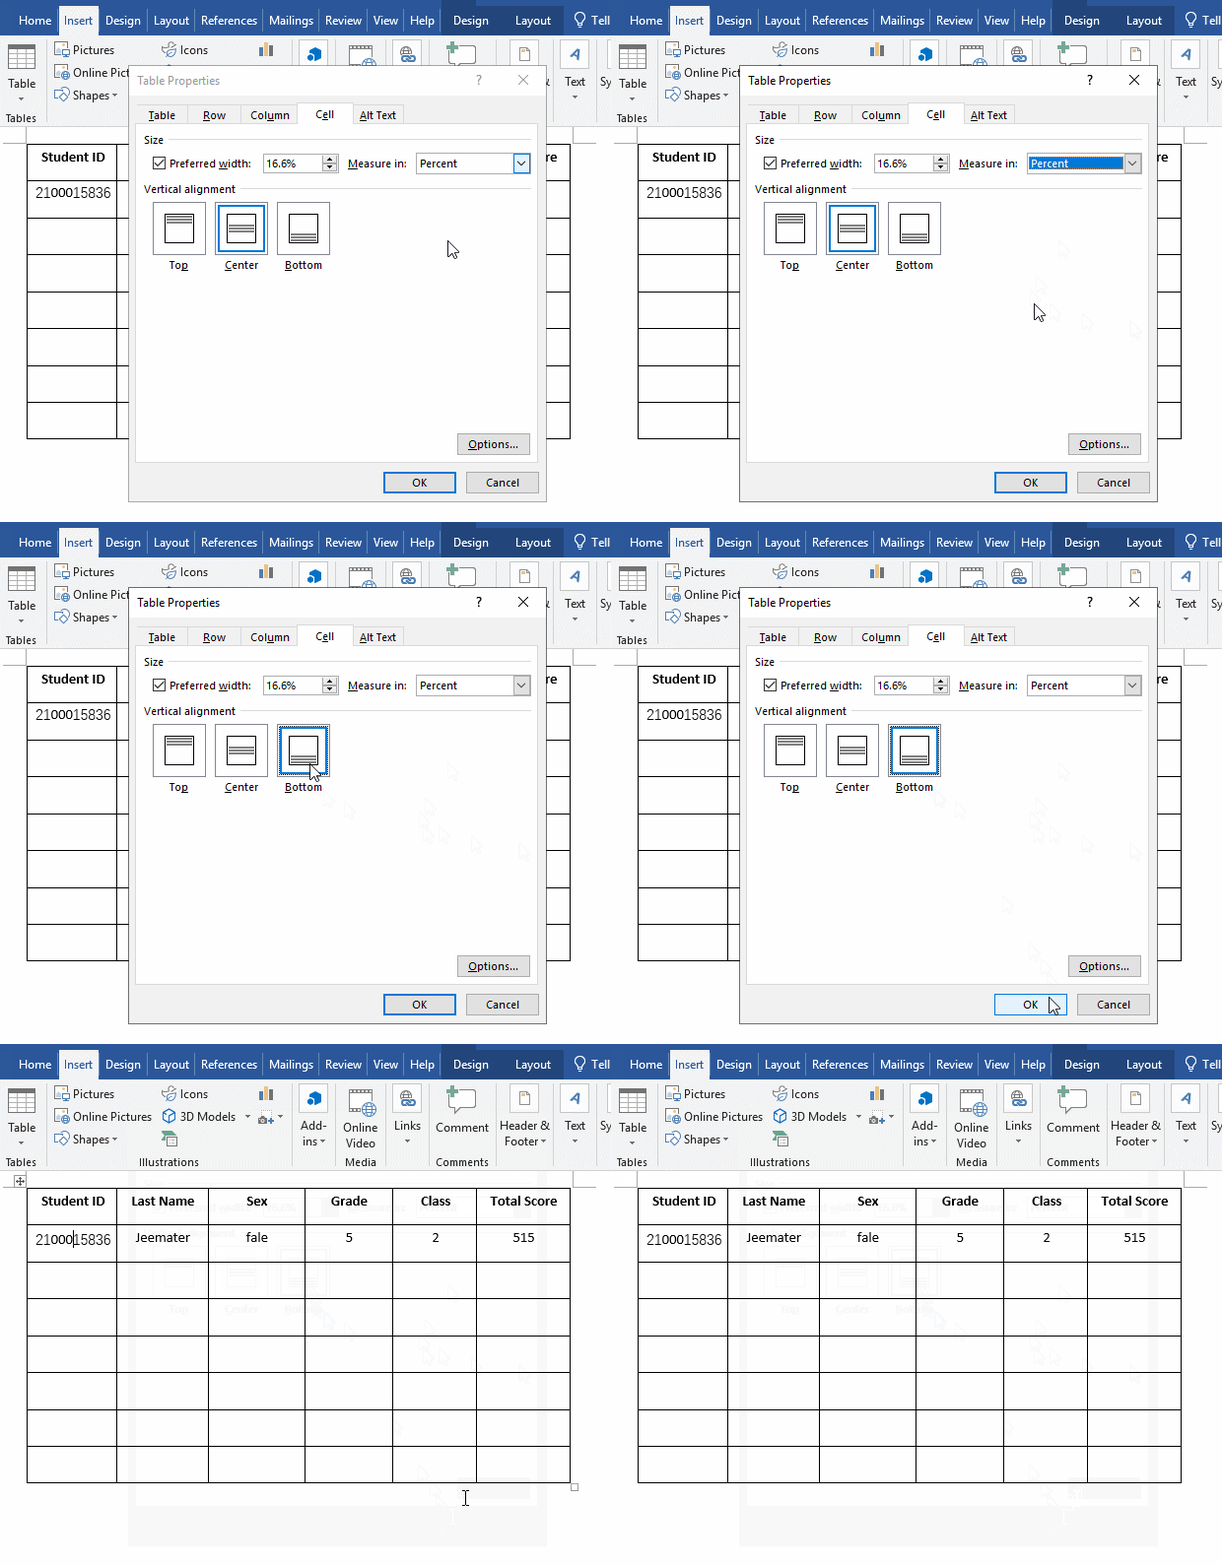
Figure 3
4. The text in the current cell has been centered vertically and horizontally. If it is centered horizontally, select Center icon in the Paragraph group in the Ribbon in the Home tab to align it.
II. How to set Wrap text and Fit text for Cell in Word
1. Open the Table Properties dialog box in the same way, click Options in the lower right corner, open the Cell Options dialog box. By default, Wrap text has been checked. Now check Fit text&, and click OK twice to close the two dialog boxes opened. The text spacing of the current cell is widened to occupy the entire cell, and a thick emerald-colored horizontal line is drawn under the text, as shown in Figure 4:
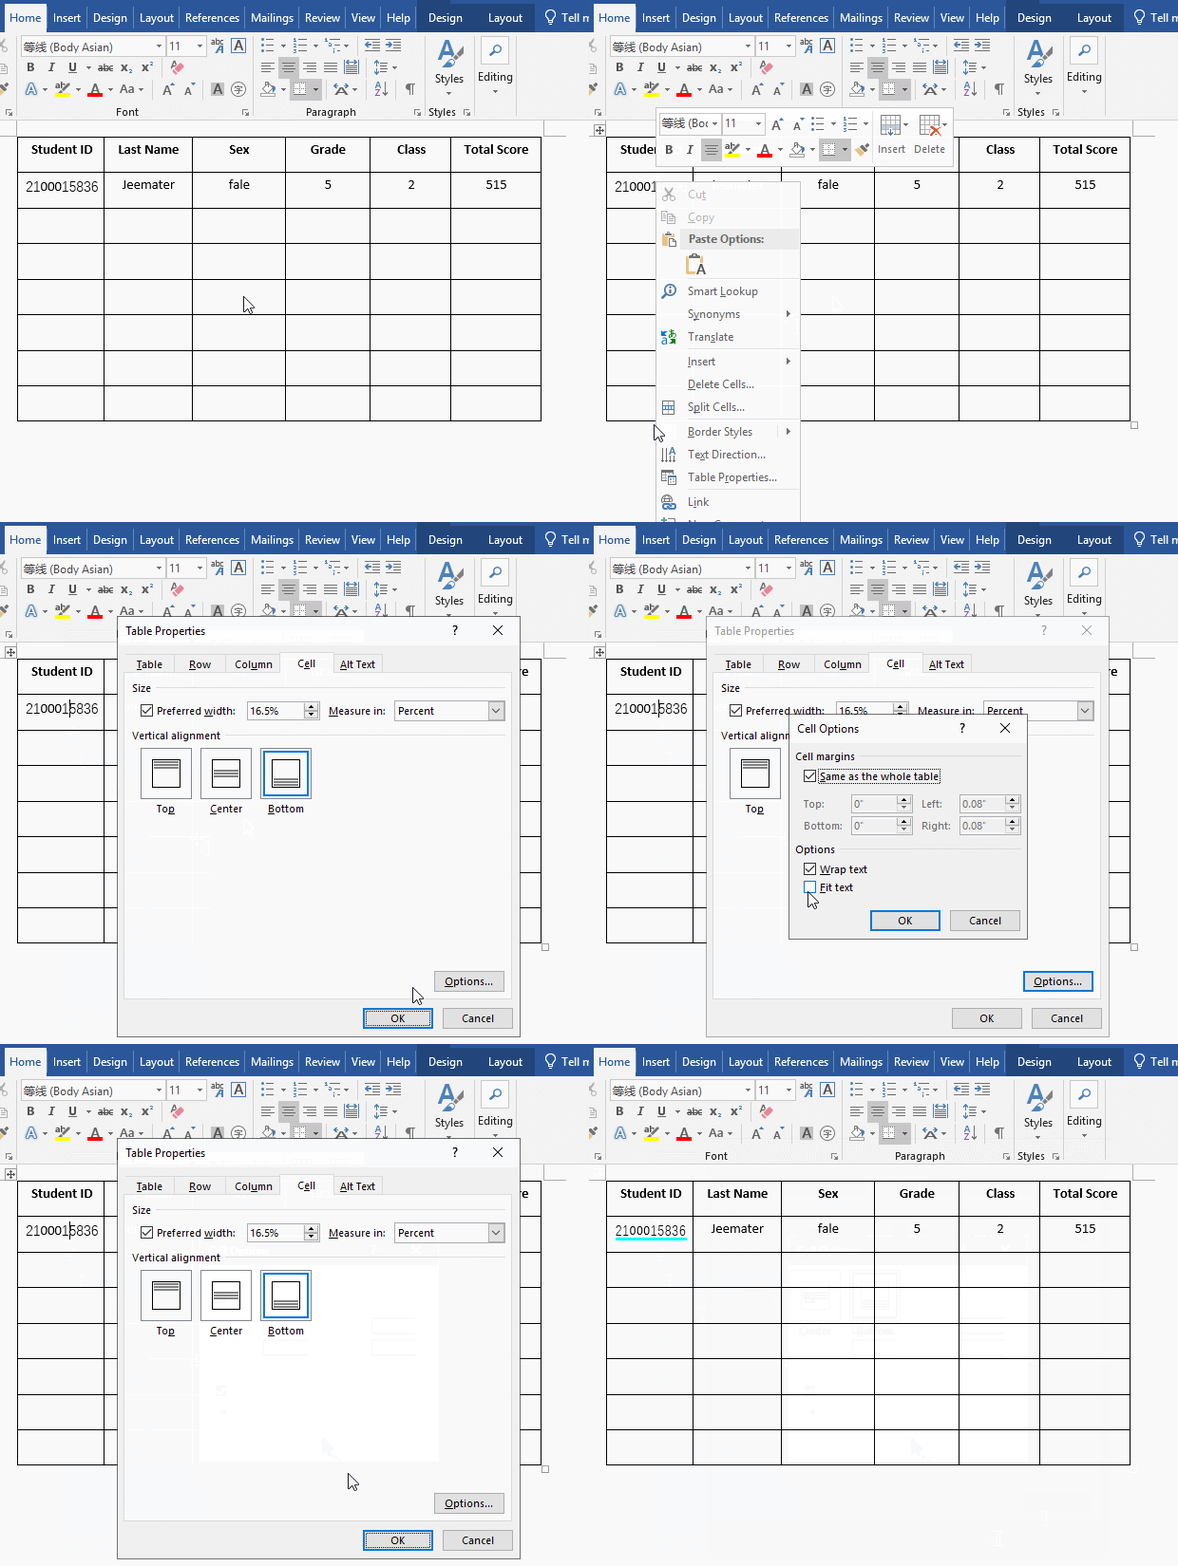
Figure 4
3
2. If you continue to input text, the cell width will not increase, and the text will be continuously compressed, as shown in Figure 5:
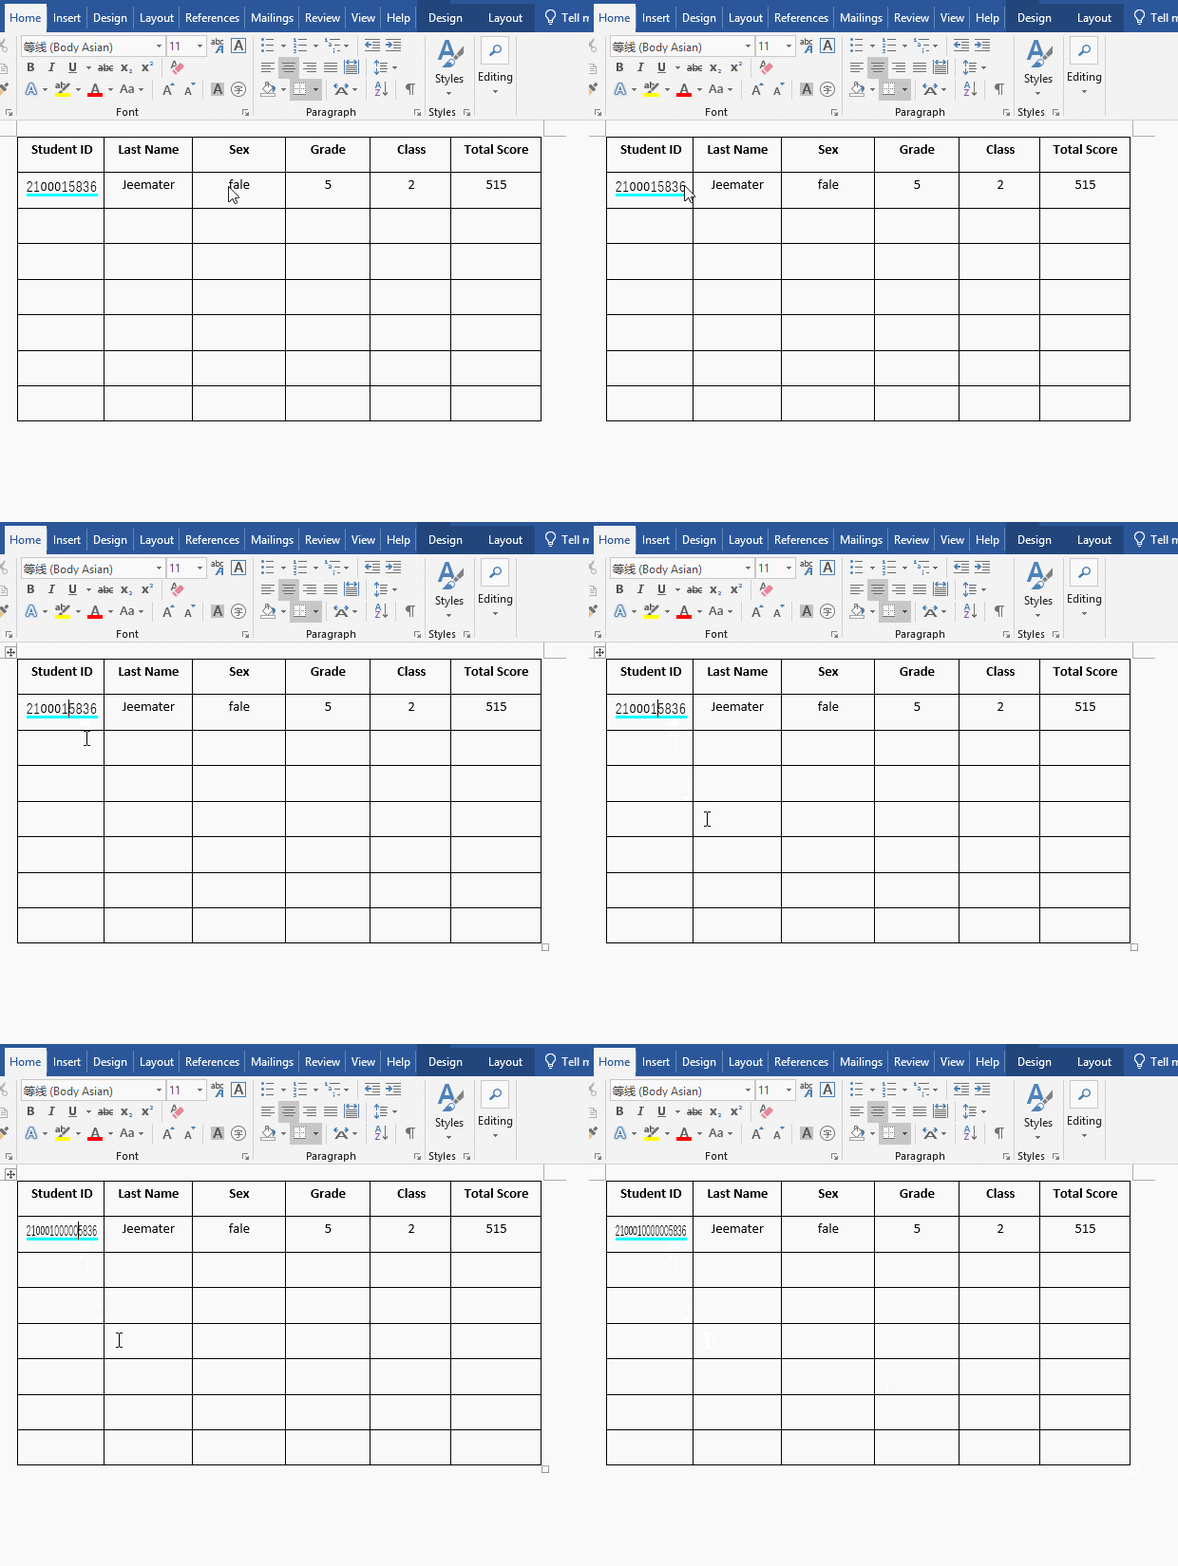
Figure 5
III. How to set Margins and Spacing for Cell in Word
There are two for setting the margins of cell, look at the first one:
Right-click the table, select Table Properties in the pop-up menu, open the Table Properties window, select the Cell tab, click the Options button in the lower right corner of the window, open the Cell Options window, put Same as the whole table is unchecked. The four margins of the Top, Bottom, Left, and Right can be set. The top and bottom margins are 0, and the left and right margins are both 0.08" by default. Now adjust the top and bottom margins to 0.01". After clicking OK;, the current cell's top and bottom margins are adjusted to 0.01", but the height of the cell's row also increases. The demo is shown in Figure 6:
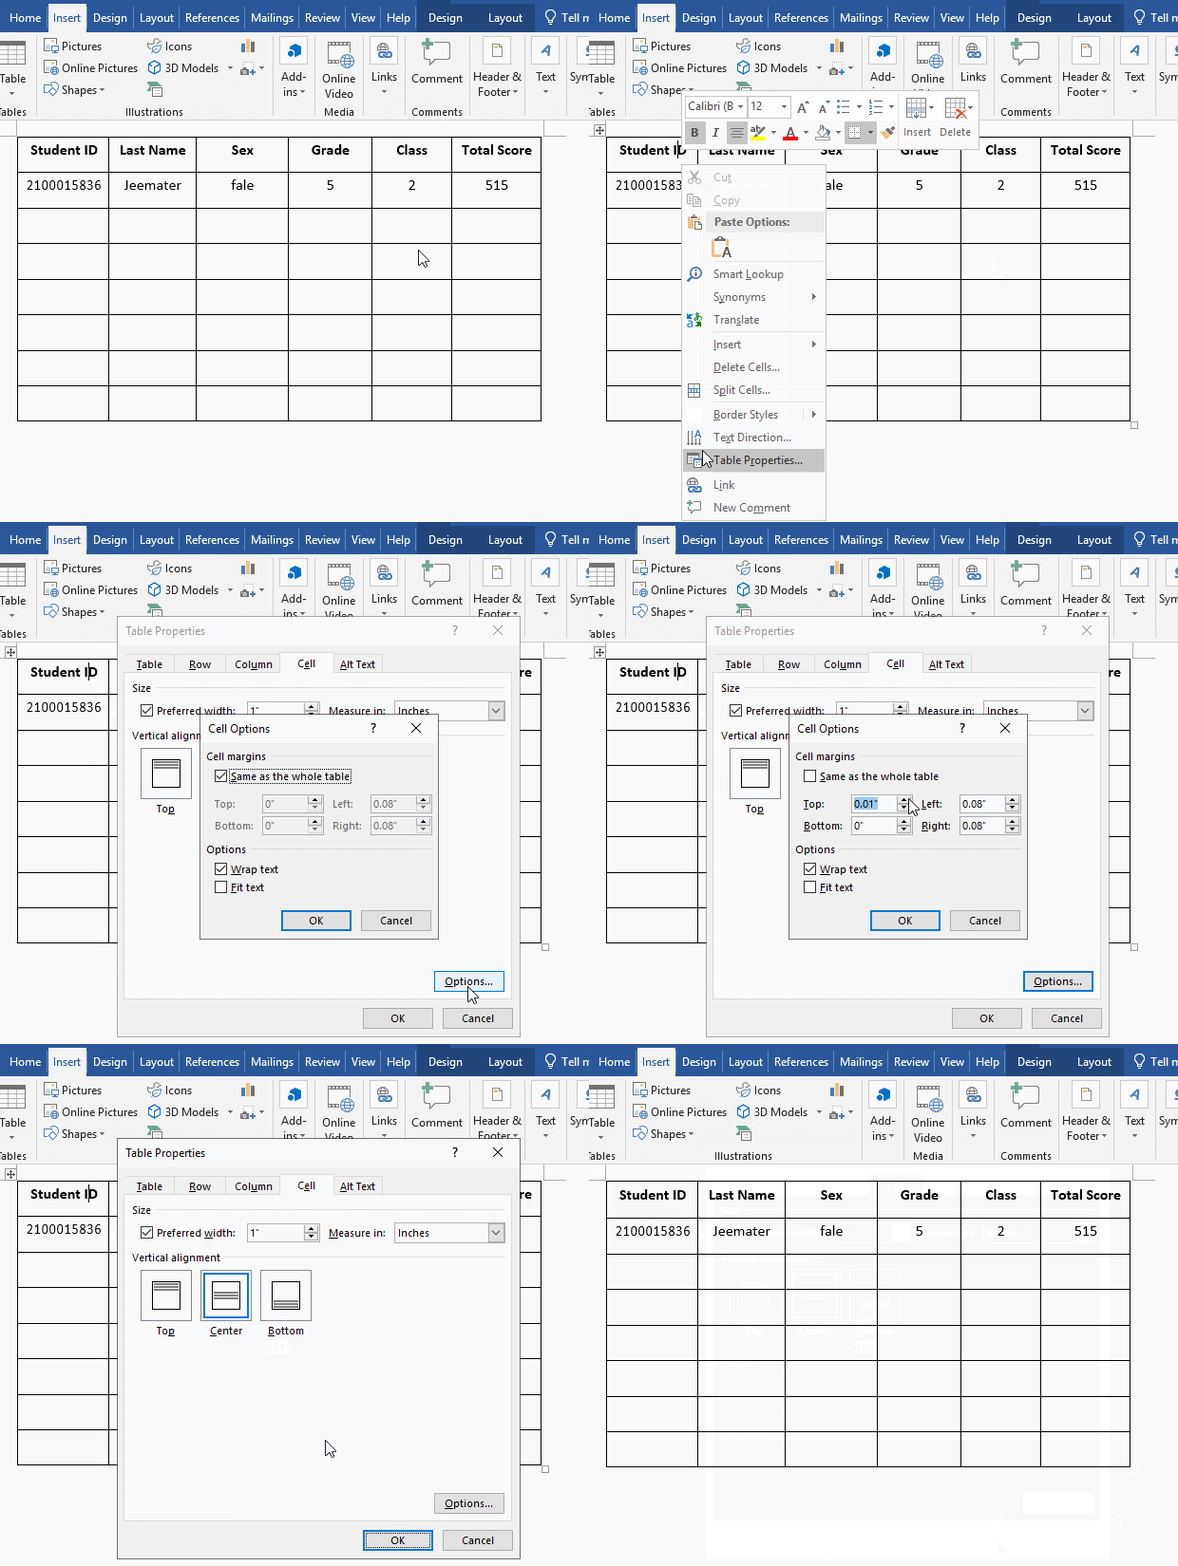
Figure 6
The second:
1. Position the cursor in the cell you want to set, select the Layout tab, click Cell Margins, and open the Table Options window, as shown in Figure 7:
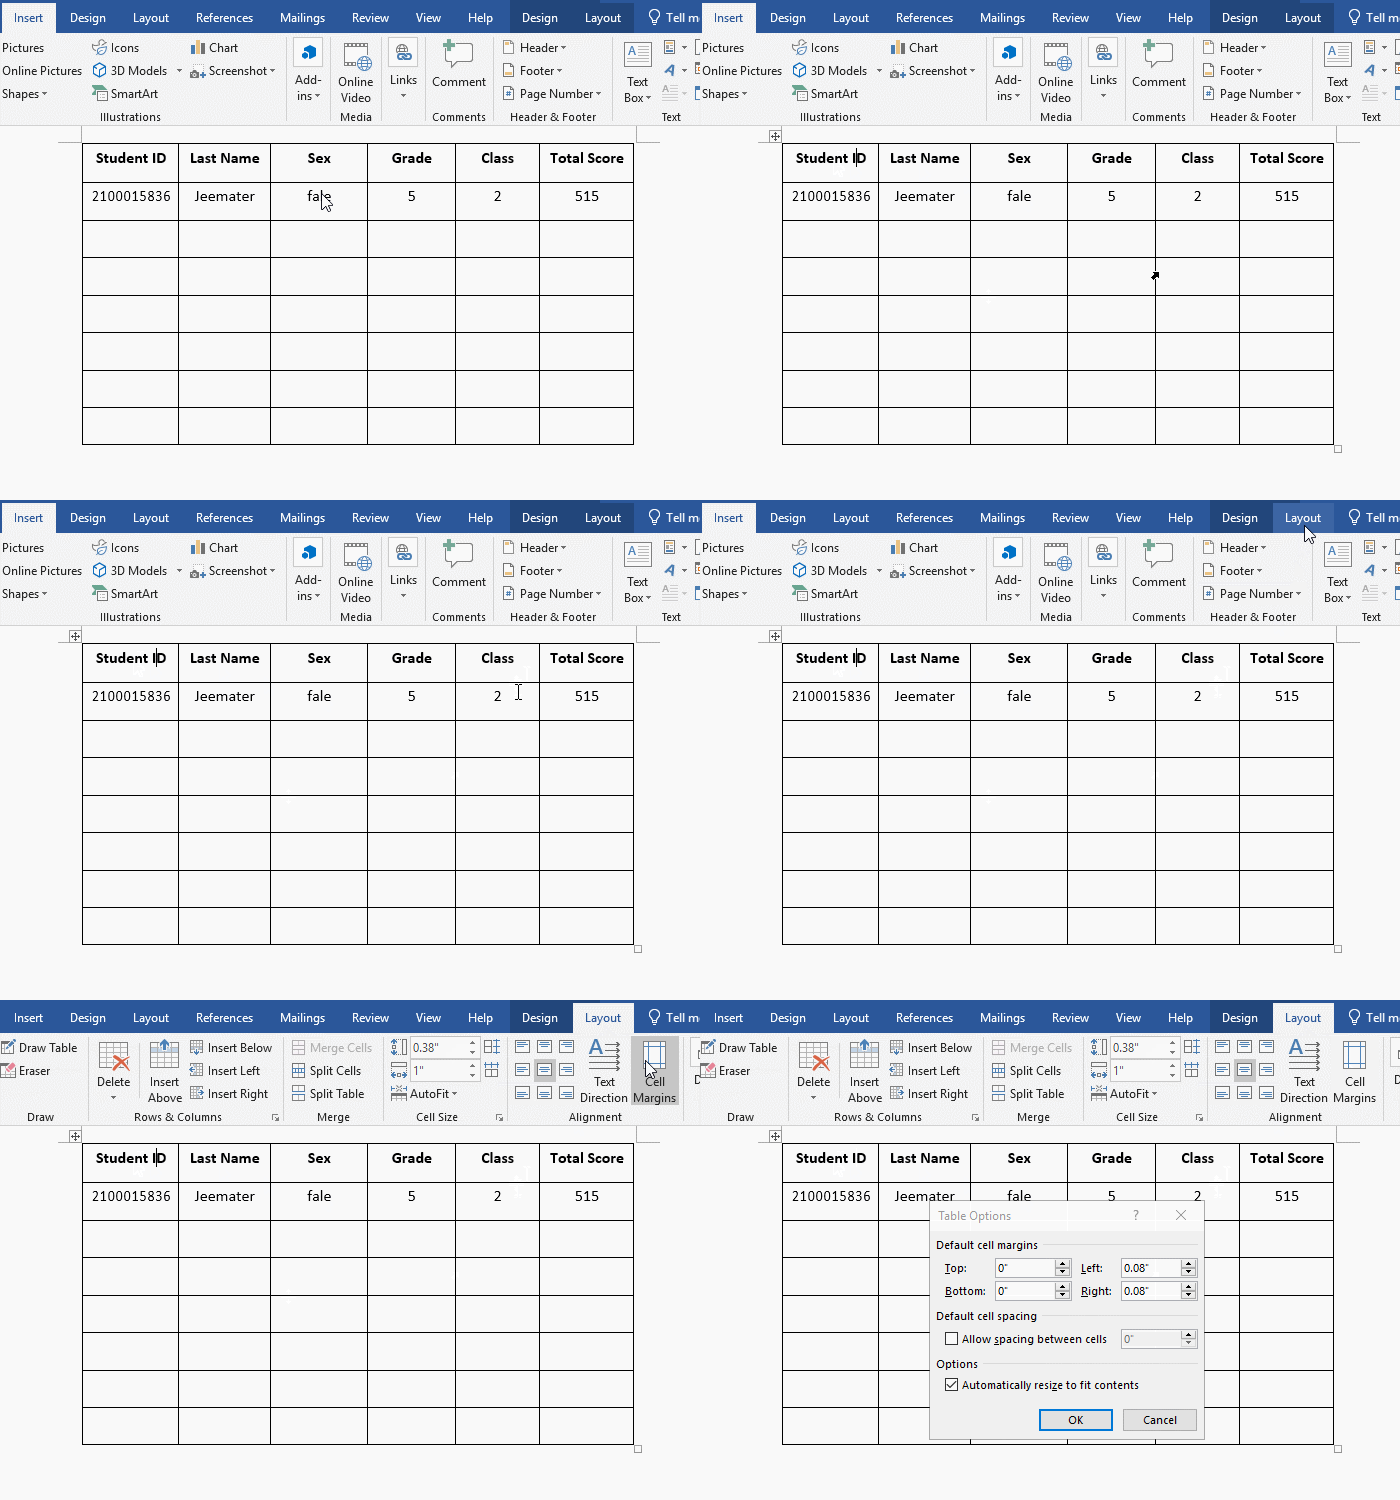
Figure 7
2. Although the Top and Bottom margins are set to 0.01" just now, 0" is still displayed here, and their values?can also be set. The method is the same as the above, so I will not repeat them.
Cell spacing settings:
Open the Table Options window in the same way, check Allow spacing between cells, set the value to 0.01", and click O, the spacing between each cell will become 0.01", as shown in the Figure 8:
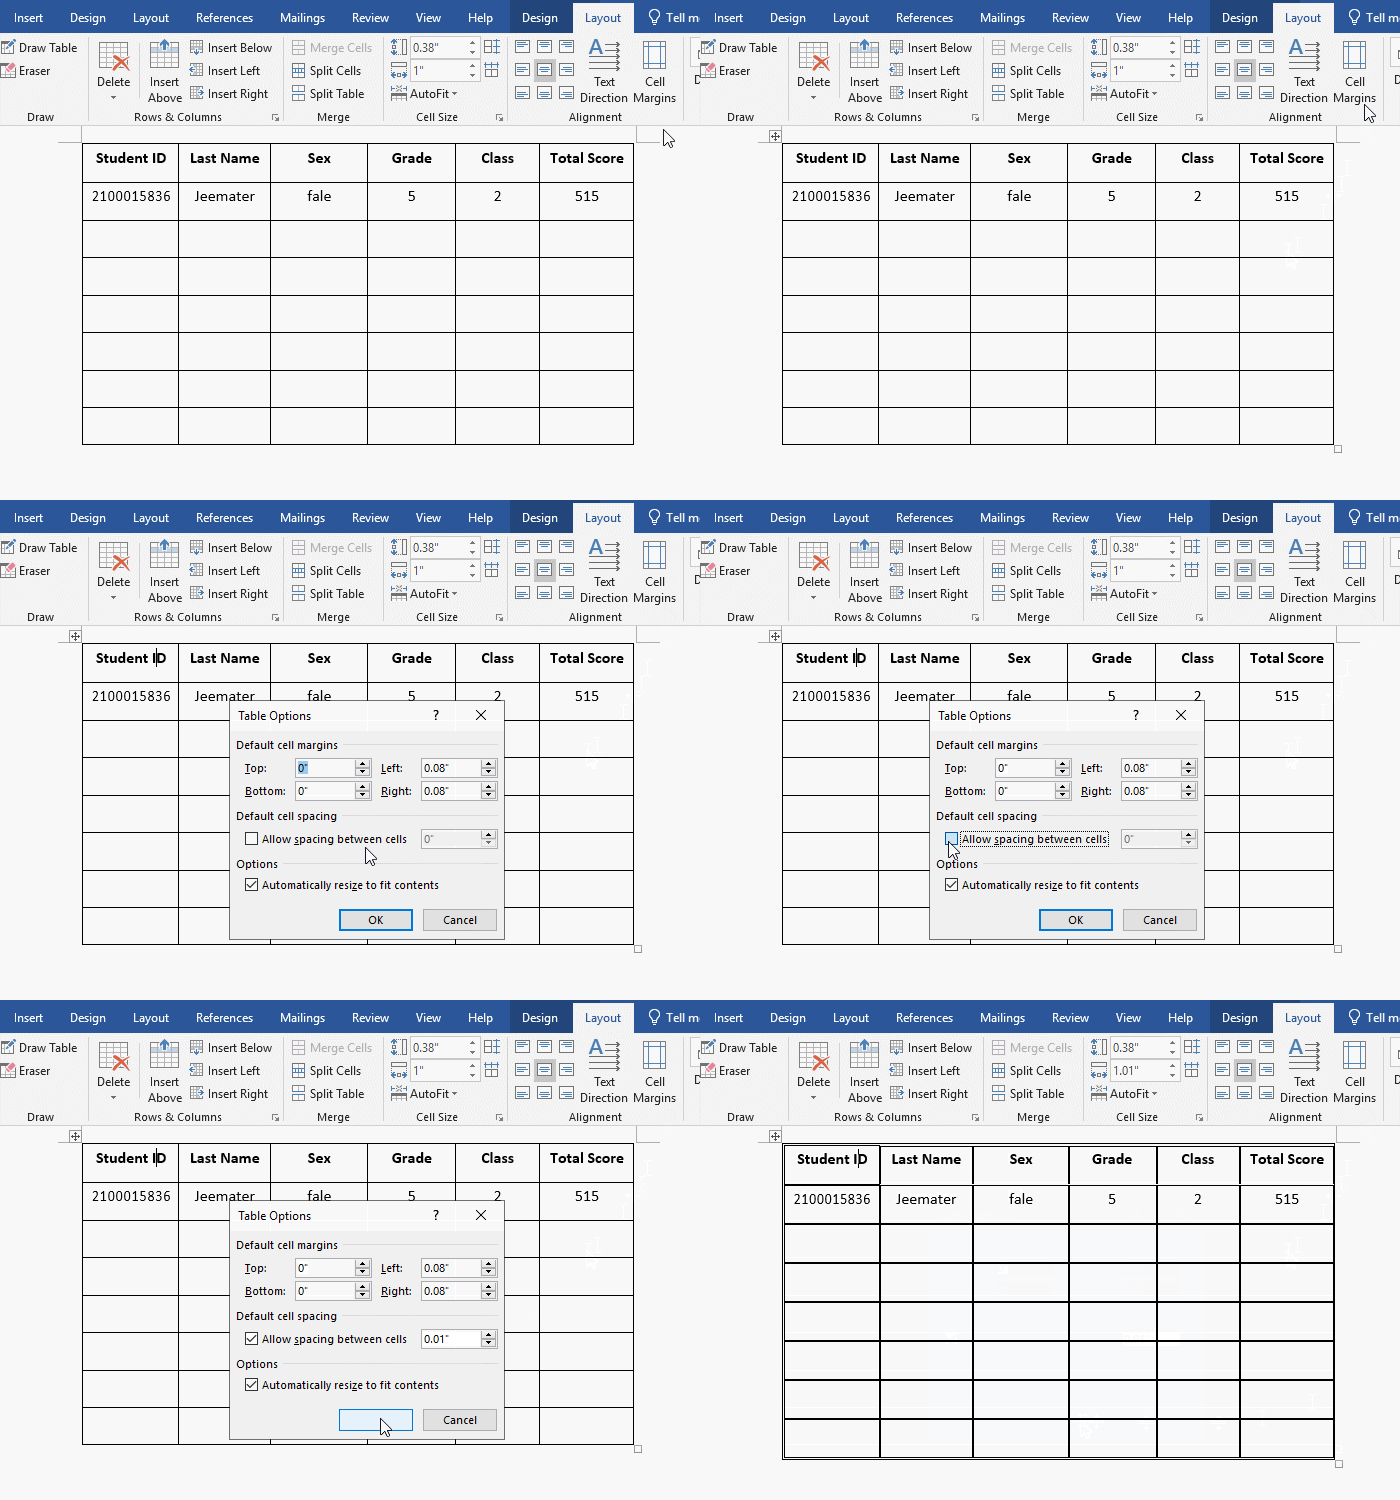
Figure 8
IV. How to set the Text Direction of cell in Word
Position the cursor on the cell you want to set, click Text Direction in the Alignment in the Ribbon in the Layout tab, the text of the current cell will be displayed vertically immediately, click Text Direction again, the text will be centered; click Text Direction third, and the text will become horizontal again. The demo is shown in Figure 9:
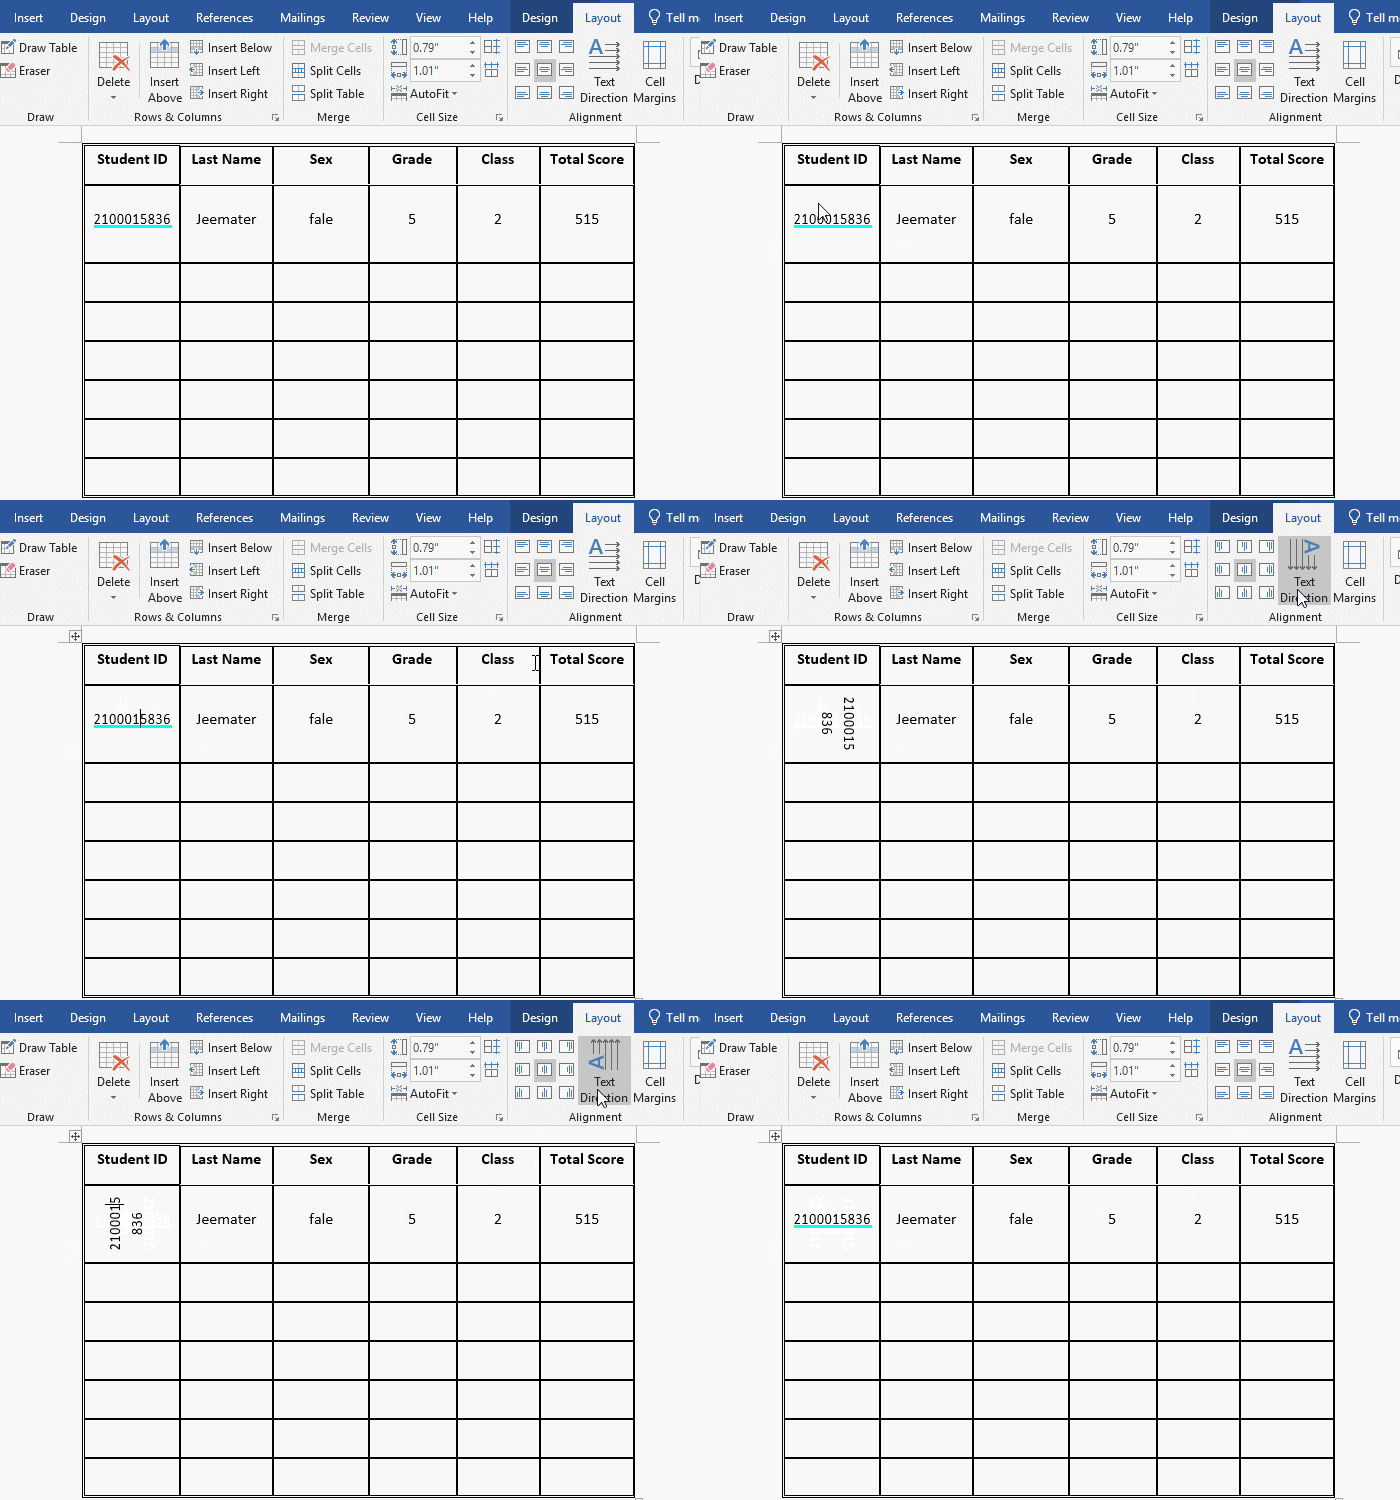
Figure 9
-
Related Reading
- Css page margin not working, with top, bottom, left,
- How to delete table lines in Word (one line, remove
- C# hashtable synchronized and SyncRoot(cost comparis
- How to move rows,columns,cells,table in excel(there
- How do I rotate a page 90 degrees in Word, with rota
- How to select, move, copy and remove a table in Word
- How to lock cells in excel, with shortcut, freeze ce
- Input text and Word can't type in table cell, select
- How to align tables in Word, with aligning text and
- C# Hashtable create, add, update, remove and removed
- How to split and merge tables in Word (5 ways), with
- Combine multiple excel sheets into one pivot table w
