 Office > Excel > Excel 2019 > Content
How to wrap text in excel(with shortcut, automatically wrap, across multiple cells without merging)
If you enter a text in a cell that exceeds the length of the cell, the text does not automatically wrap in Excel. To change the line, you must press the shortcut or set the cell to automatically wrap text. Excel has a feature, which is to remember the current operation, for example, input text and press the shortcut key to automatically wrap, usually after pressing the shortcut key twice, the next time the inputted text exceeds the length of the cell will automatically wrap.
There are two cases of wrap text in the cell in Excel. One is to wrap in one cell, and the other is to wrap in any specified cells. The former can only set one cell wrap text or batch set multiple cells wrap text at a time; the latter is mainly used to display the paragraph to a specified number of cells, and automatically wraps if the text exceed the specified cells.
I, How to wrap text in excel
1. Use Excel wrap text shortcut(Alt + Enter)
Suppose you want to enter the phrase "How to automatically wrap text in excel? There are two cases, one is". Select the cell A1, enter "How to automatically", at this time, the cell is full, you need to wrap, press Alt + Enter to wrap, continue to enter "wrap text in excel? There", "There" in the excess cell, press Enter to exit input, double-click A1 again, continue to enter "are two cases, one is", "one is" has been automatically changed to the third line, and the remaining characters are continued, If the cell is exceeded, it will automatically wrap; the operation steps are as shown in Figure 1:
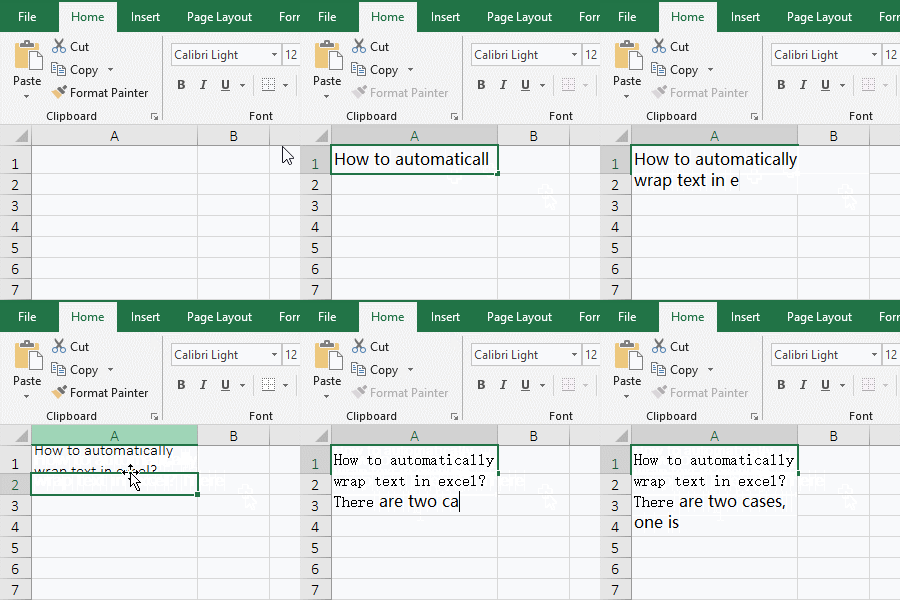
Figure 1
2. Use the "Wrap text" option
If you enter the words "How to automatically wrap text in excel". Select the cell B1, enter "How to automatically", select the "Home" tab, click "Wrap Text", double-click B1, continue to enter " wrap text in excel", The word that exceeds the cell is automatically wrapped; the operation steps are as shown in Figure 2:
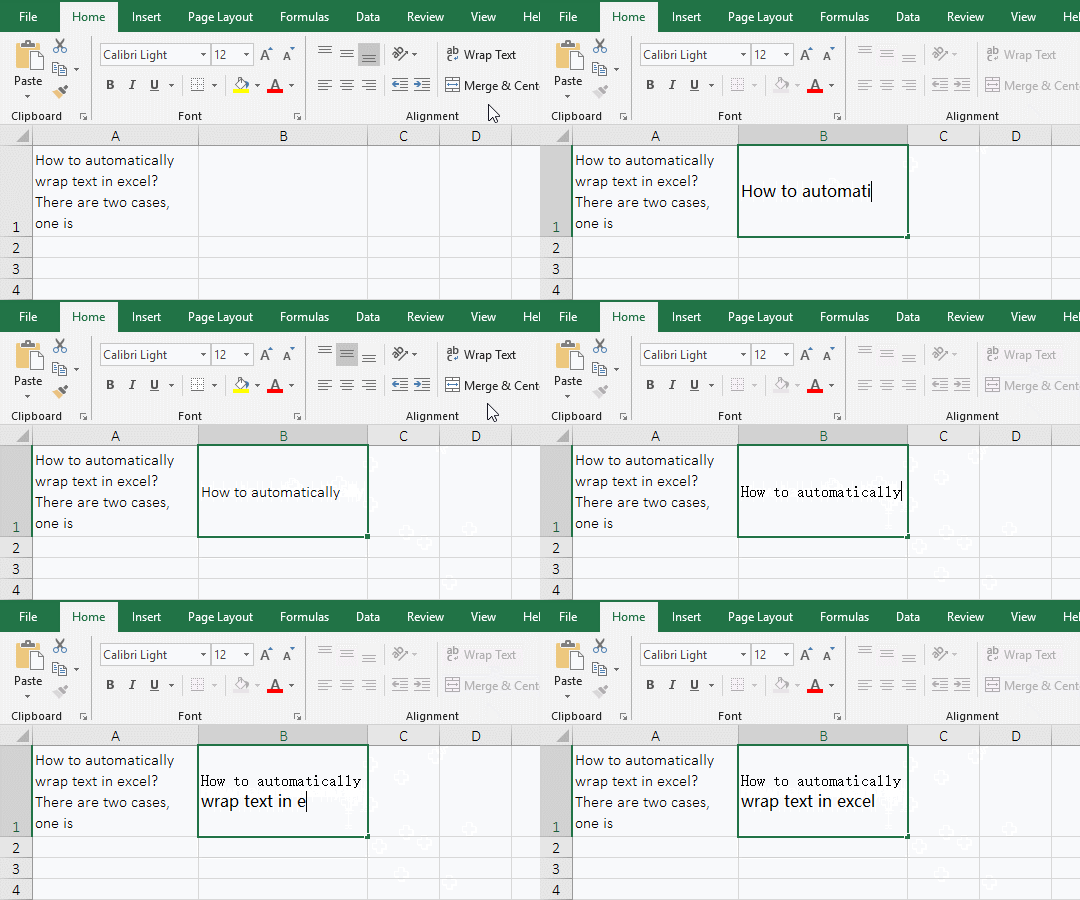
Figure 2
II, How to batch automatically wrap text in excel
1. Select A1:D4, select the "Home" tab, and click "Wrap Text", then the "How to batch automatically wrap text in excel" in cell A1 will be automatically changed into three lines; enter "How to wrap text in excel" in cell B1, it automatically wraps when the text fills the cell; the operation steps, as shown in Figure 3:
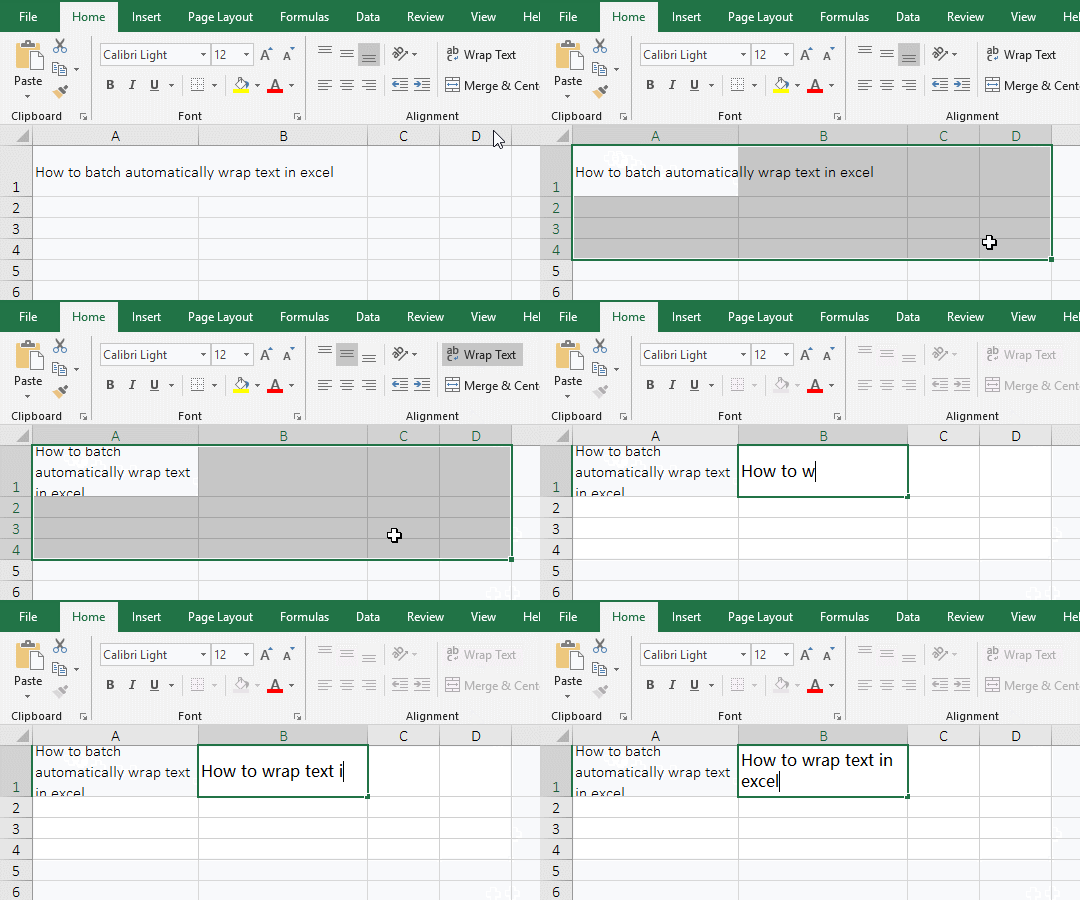
Figure 3
2. After setting multiple cells to be automatically wrapped, if you want to cancel, you can either cancel one or several at a time, or cancel all at once.
III, The solution that each line is followed by a dash(- or _) resulting in an automatic line
1. Enter "excel 2019-" in the A1 cell, press Alt + Enter to wrap, continue to enter "excel 2016-excel 2013-", press Enter to exit the input state, the entered text is free to wrap; move the mouse to on the right line of column A, when the mouse changes to the line + double arrow icon, Hold down the left button and move to the right until wrap after the dash in each line. The operation steps are as shown in Figure 4:
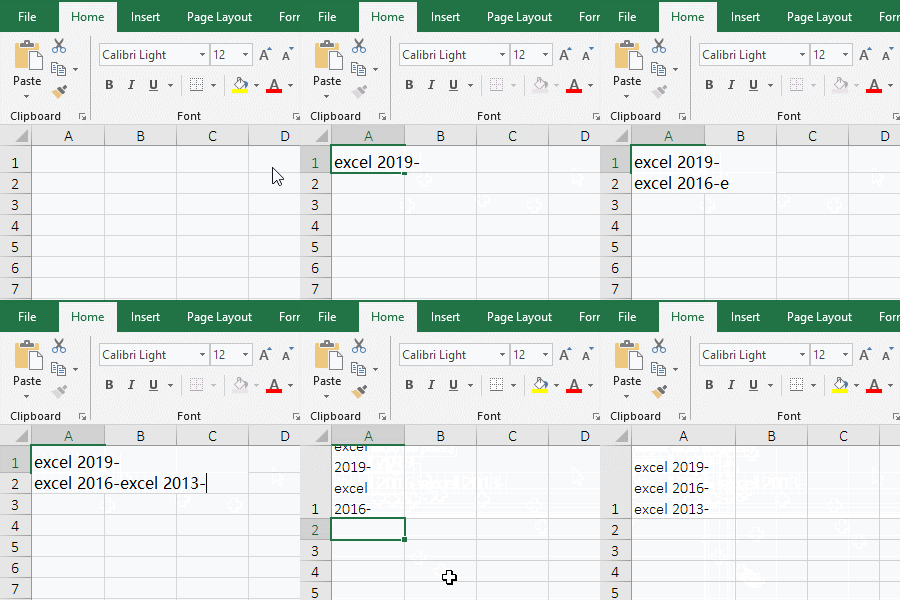
Figure 4
2. The wrap text caused by the dash(- or _) can be solved by simply widening the cell.
IV, Excel wrap text across multiple cells without merging
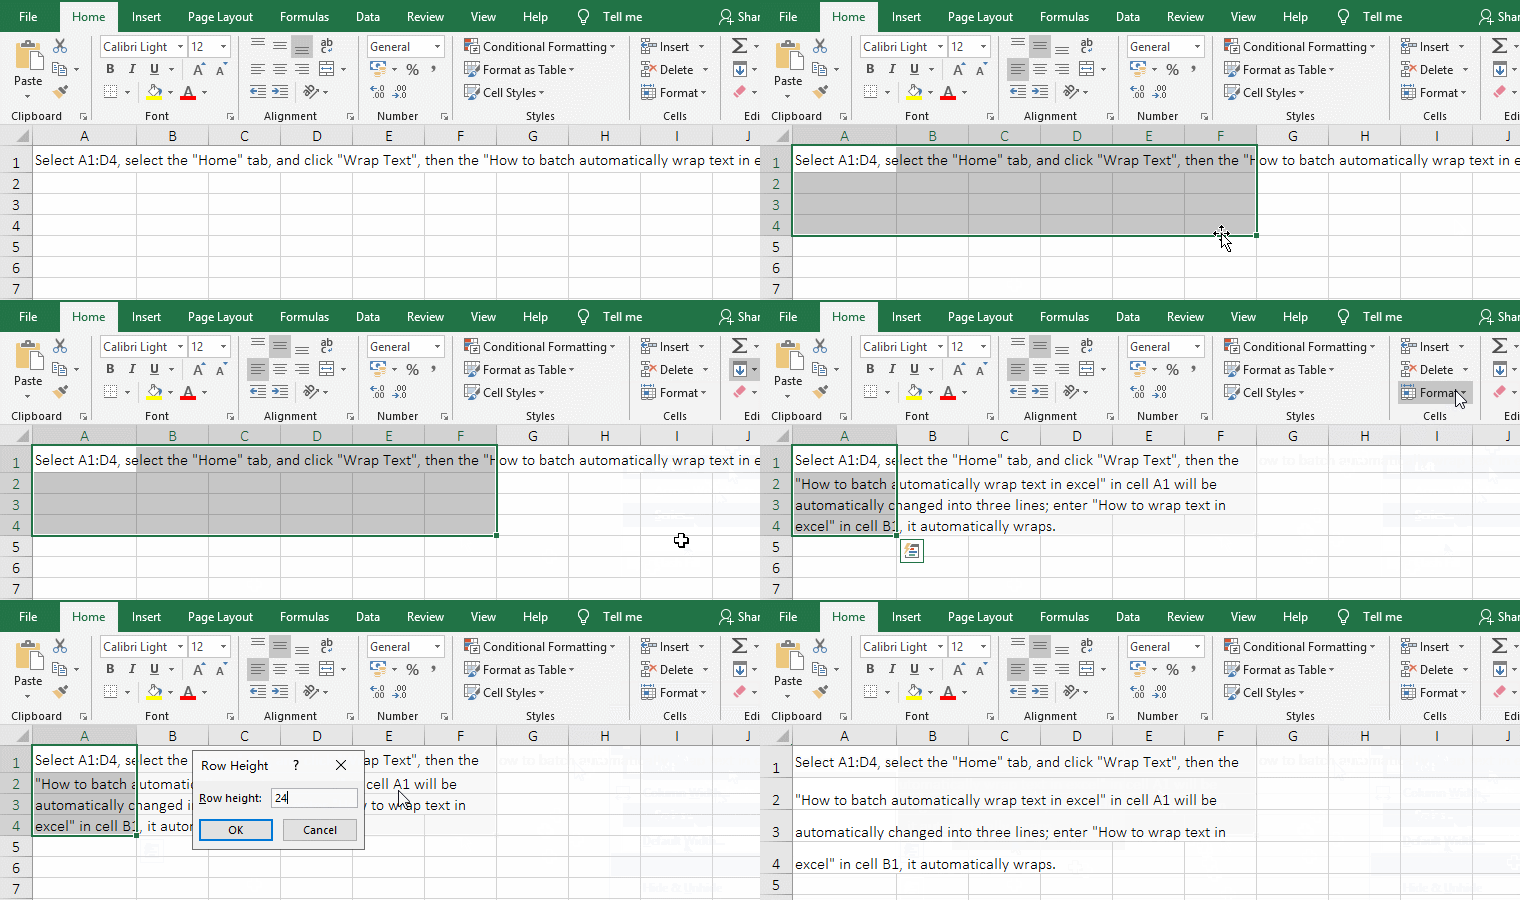
1. Select the cells A1:F4, select the "Home" tab, click the "Fill" icon, and select "Justify" in the pop-up menu, the content in A1 is fixed to A1:F4, the text that exceeds F6 will be automatically wrapped; once again, click "Format", select "Row Height" in the pop-up menu, enter 24 in the pop-up dialog, click "OK", set the paragraph height to 24; the operation steps, as shown in Figure 5:
Figure 5
2. Tip: "Justify" is called "Rearrange Content" in older versions(such as Excel 2003), but versions of Excel 2007 and later include Excel 2010, Excel 2013, and Excel 2016 changed to "justify", the function is the same.
-
Related Reading
- Excel Len and LenN function usage(7 examples, with I
- Excel Search function and SearchB usage(13 examples,
- How to move rows,columns,cells,table in excel(there
- Excel CountA and CountBlank function usage examples(
- Excel lookup function usage(Multiple conditional and
- How to use Replace function in excel(9 examples, wit
- Excel AverageIfs fuction usage(7 examples, include m
- 8 examples of Excel Match function, include it and S
- How to use offset function in excel, include it and
- How to use Excel rank function(11 examples, with Ran
- How to use Excel frequency function(6 examples, with
- Excel SumProduct function(multiple criteria, with if
