
How to create styles in Word, with changing the style used by multiple headings or paragraphs
In Word, in addition to using ready-made styles, you can also customize styles, that is, create styles. Customized styles can be saved to the style gallery, and used as the style provided by Word. For example: if you make a very beautiful style yourself and often use it, you can add it to the style gallery. Customized styles can set Font, Font Size, Bold, Italic, Underline, Alignment, Numbering, Borders, Text Effects, Shortcut keys, etc., so you can create a very beautiful style.
If multiple styles are applied to a document (for example, several heading styles are used), and they are distributed in each chapter of the document, if you want to change them, it is time-consuming and troublesome to select and change them one by one. If you select all and select the entire document, is there a better way to select and change? Word developers may also notice this problem, so they provide a way to select all the same styles at once, which makes it very easy to change the same styles, instead of selecting and changing one by one.
I. How to create styles in Word (How to create a paragraph style in Word)
1. Select Home tab, click the Hyphen + Down Arrow icon in the Style group, select Create a Style in the pop-up menu, open the Create New Style from Formatting dialog box, click Modify button, opens the window for setting the specific style, and the demonstration is shown in Figure 1:
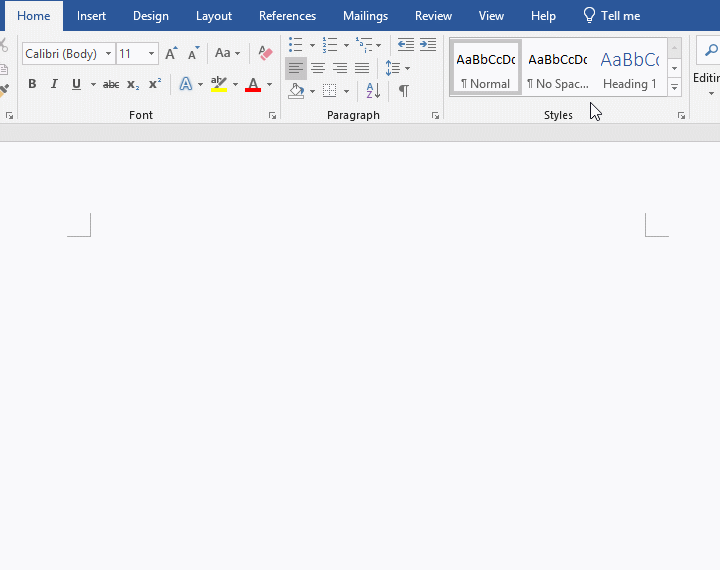
Figure 1
2. Enter the name of the style after Name, for example: Headline; there are five Style types, namely: Paragraph, Character, Linked (paragraph and character), Table and List. You can select one according to your needs. We keep the default third item; select Title for Style based on, because we want to make heading style; keep the default option for Style for following paragraph; select Font (such as: Microsoft Himalaya), font size select 48 for Font Size, select blue for Font Color; select Center for Alignment, the preview effect is shown in Figure 2:
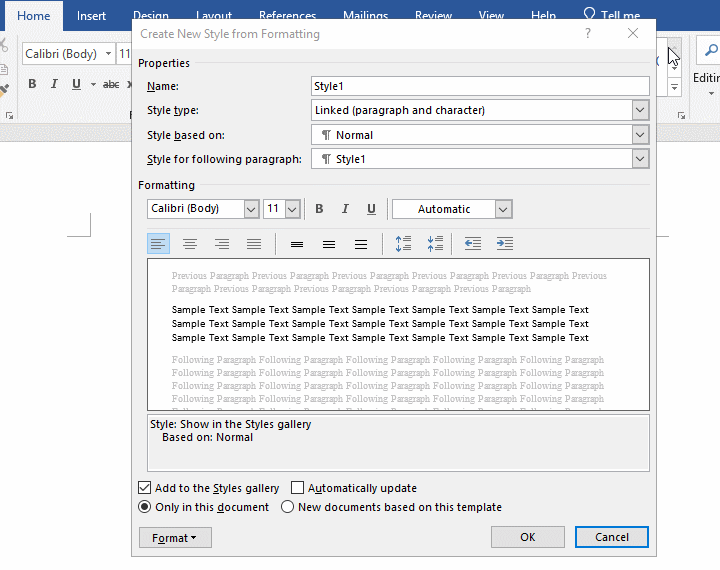
Figure 2
There are four groups of icons on the preview box. The first group is for setting Alignment, the second group is for setting Line Spacing, the third group is for setting Paragraph Spacing, and the fourth group is for setting Indentation; if you don't know what to set for each item, look at the setting result under the preview box, each setting is displayed here.
3. Check Add to Style gallery, Automatically Update can be checked or not; if the created style is only used in this document, select Only in this document; if you want to use the created style as a template, select New documents based on this template.
4. Click the Format drop-down list box, in the pop-up menu, some options have been introduced, some have not been introduced, and will be introduced in subsequent chapters; each time you select an option, a setting dialog box will be opened, and follow the corresponding methods to set. If we select the Text Effects that will be introduced later, fill the title with a gradient, and click OK to preview the effect, as shown in Figure 3:
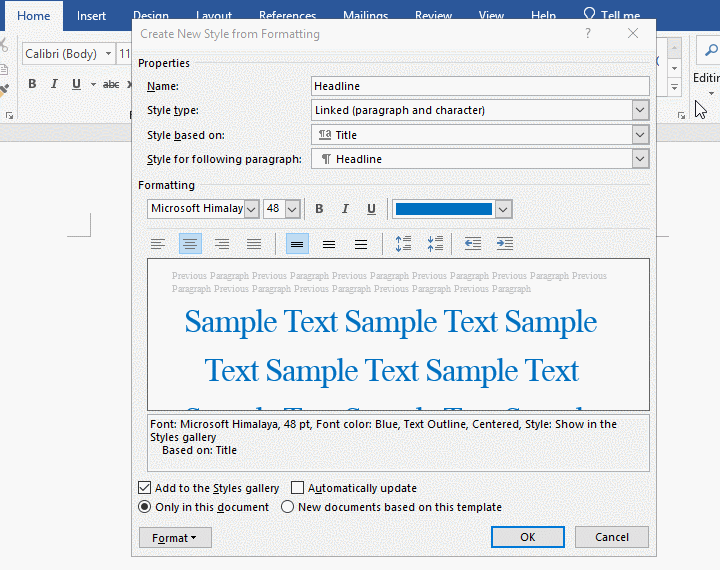
Figure 3
5. After returning to the Create New Style from formatting dialog box, click OK, the created style has appeared in the Styles group, as shown in Figure 4:
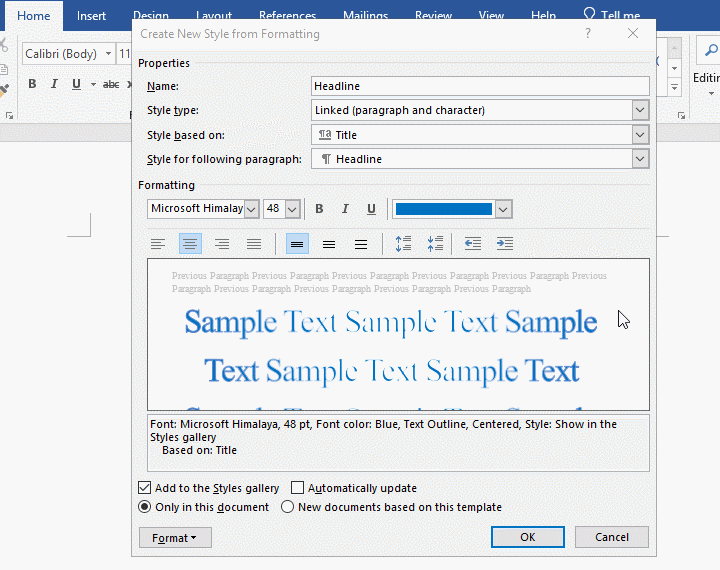
Figure 4
6. If you want to modify or delete a created style, right-click it, and a pop-up menu will appear, as shown in Figure 5:

Figure 5
7. Just select the corresponding option, but you must be careful before removing, otherwise the hard-created style will be gone.
II. How to apply Title style in Word
Select Home tab again, click the Hyphen + Down Arrow icon in the Styles group, and select Apply Styles in the pop-up menu to open the dialog box, stretch the dialog box to display all content. Click Reapply to apply the selected style at the cursor, and click Modify to modify the selected style. See screenshot in Figure 6:

Figure 6
III. How to change heading styles in Word (How to modify a style in Word)
(I) How to change the style used by multiple headings in Word
1. Open a document that uses a heading style. If you don't know what style is used for the heading you want to modify, you can select the Home tab, position the cursor in the heading or select the heading, then Word will automatically mark the style it uses, for example, Heading 4, right click it, pop-up menu, as shown in Figure 7:
Figure 7
In the pop-up menu, select Select All: (No Data), then all the text in the document using the Heading 4 style will be selected. If you want to know how many headings use Heading 4, you can right-click Heading 4 again, and 7 Instance(s) will be displayed in the pop-up menu, as shown in Figure 8:
Figure 8
2. At this time, you can modify them, for example: change a heading style, modify the font, set the font size, in short, set it freely like selecting ordinary text that has never been applied with any style.
3. Let's right-click the Custom Heading style: Headline. From the pop-up menu, you can see that only one heading in the document uses it, because the option is Select All 1 Instance(s).
4. The selection method of using other heading styles is the same as above.
(II) How to change the style used by multiple paragraphs in Word
1. Right-click the Normal in the Styles group, and select Select All 42 Instance(s) in the pop-up menu, and the paragraphs using the Normal style will be selected. What's interesting is that there are only blank lines with line breaks even with the Normal style, these lines are all selected. In addition, paragraphs with different font sizes and different line breaks are all selected, as shown in Figure 9:
Figure 9
2. If the style is not used, the option to display how many instances is grayed out and cannot be selected, as shown in Figure 10:
Figure 10
3. The option of Select All [how many] Instance(s) is changed to Select All: Not Currently Used, indicating that the document does not use the No Spacing style.
-
Related Reading
- How to delete table lines in Word (one line, remove
- How to sort paragraphs in Word, with sorting them al
- How to add cross symbol and tick mark in Word, with
- How to create and save as a new document in Ms Word,
- How to select multiple photos in Word and why is it
- Find ProPlusww.msi when opening Office(Word/Excel),
- How to set Header and footer in word(13 examples), i
- Word art transform text effect (Follow Path, Warp, A
- How to convert PowerPoint to word(4 examples), inclu
- How do I rotate a page 90 degrees in Word, with rota
- Can't print from microsoft Word (6 possible reasons)
- How to set default Printer in Microsoft Word when se