How to set a Tab Stop in Word, with using left and right Tab Stops to align text
There are as many as five types of text alignment in Word, but they still can't meet the actual needs, so Tab Stops appear again. From the previous sentence, we can see that the Tab Stop is used to align the text. What is a Tab Stop? It refers to the position where the cursor is moved to by pressing the Tab key in Word. In fact, it is how many characters the cursor exaggerates. Not only in Word, when you press the Tab key, the cursor will skip a certain distance. In other text editing tools (such as Notepad), it will also skip a certain distance. The difference is: how many characters to skip, it can be set arbitrarily in Word, but it is not possible to set the number of characters to skip for each press in Notepad. It is precisely because the number of characters to skip can be set arbitrarily in Word, it can be used to align text.
Under what circumstances do I need to use the Tab Stop to align the text? For example, a certain column in the table is set to center-aligned, and some lines have only one line, some more than one or more lines, and they are uniformly set to left-aligned. If there is only one line, they are not good-looking. They are uniformly set to be center-aligned. It doesn't look good. At this time, the Tab Stop comes in handy. Set this column uniformly to center alignment. For the misalignment of the upper and lower lines due to cross-rows, you can use the Tab Stop to align. Another example: the Tab Stop can be used to align the header and footer.
I. How to open the Tab Stop dialog box in Word?
1. After opening Word, select Home tab, click the Diagonal Arrow next to the Paragraph, open the Paragraph dialog box. Click the Tab Stop button in the lower left corner of current dialog box, open the Tab Stop dialog box, and the demonstration is shown in Figure 1:
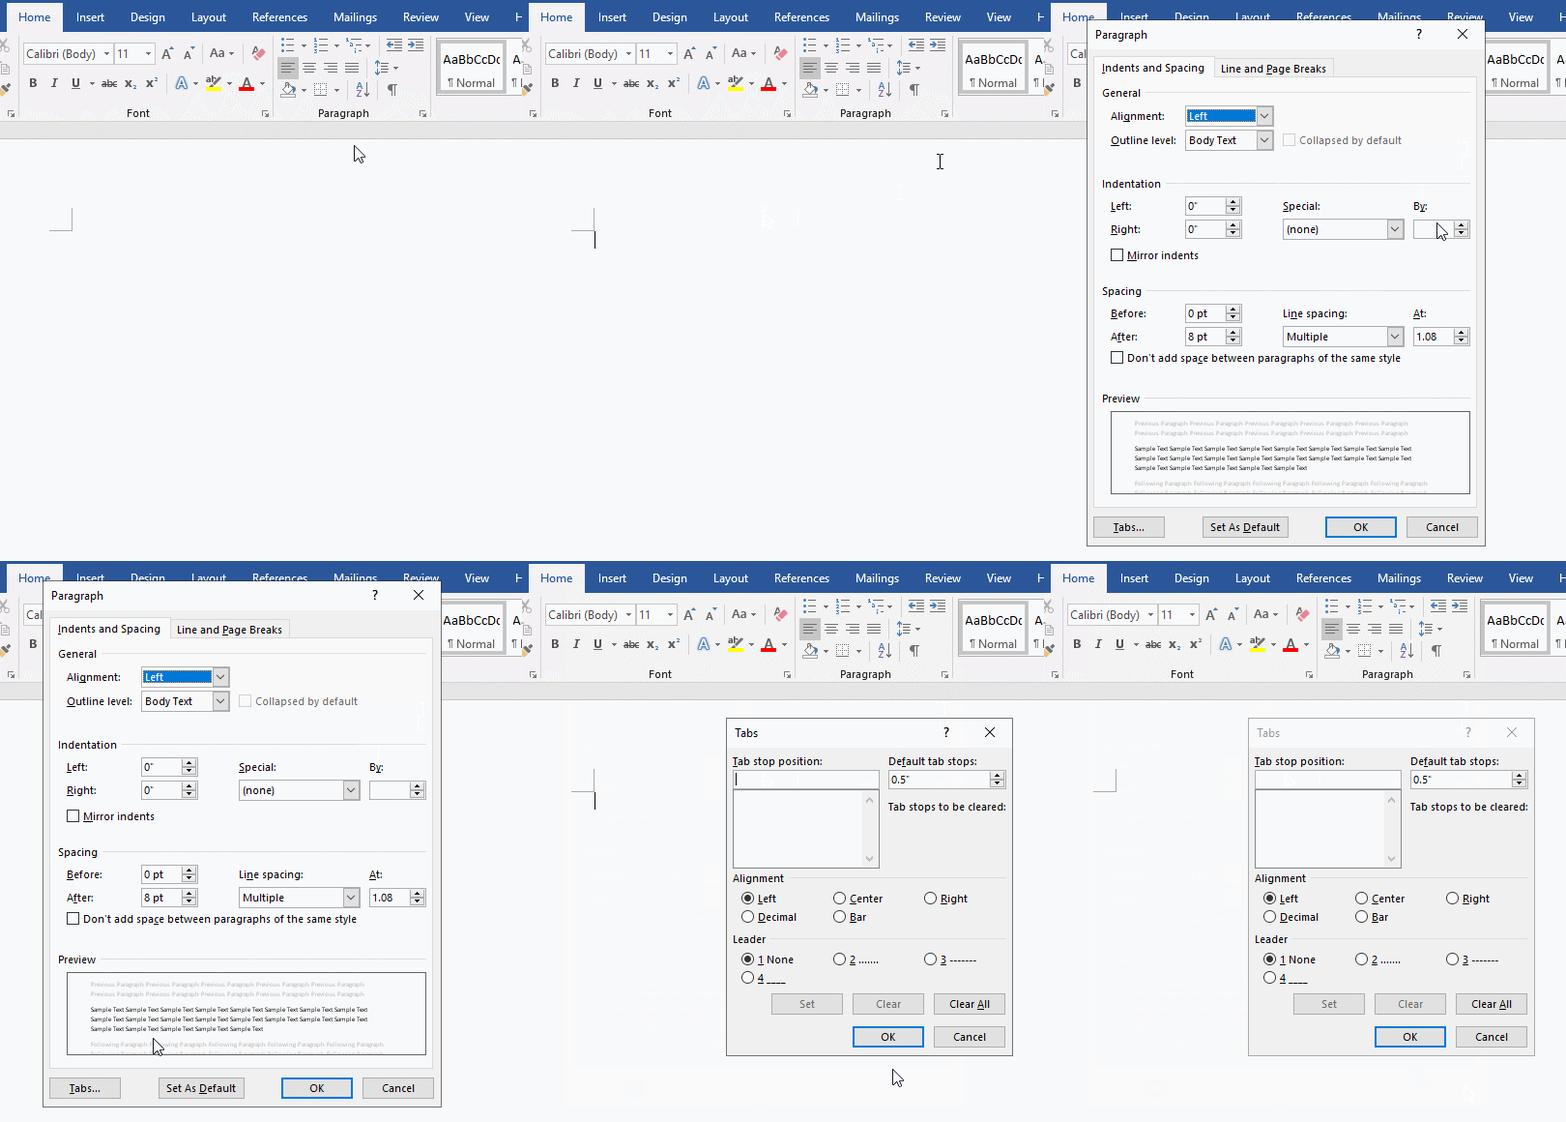
Figure 1
2. It can be seen from Figure 1 that there are three setting items for Tab Stop, namely: Tab Stop position, Alignment and Leader. Among them, the Tab Stop position is to set how many characters to skip each time you press Tab; there are five ways of alignment, namely: Left, Center, Right, Decimal and Bar. The Leader is the symbol to be used in front of the Tab Stop, generally select None for it.
II. How to set a Tab Stop in Word
Although there are a variety of header and footer styles in Word, they may not meet all our requirements. Therefore, it is useful to master the use of Tab Stops to align the text in the header and footer. Next, enter a sentence in the middle of the header, and then use a Tab Stop to divide the sentence into three parts, one is left-aligned, the second part is center-aligned, and the third part is right-aligned. Through this example, in the future, everyone can follow the analogy and use the Tab Stop to align other text that is actually needed.
Alig text in the header and footer in Word (example for how to set a left Tab Stop in Word, how to add a right Tab Stop in Word, and how to set a right aligned Tab Stop in Word)
1. There is a document with a header inserted. Click Type here, paste Left align Center align Right align into here, the demonstration is shown in Figure 2:
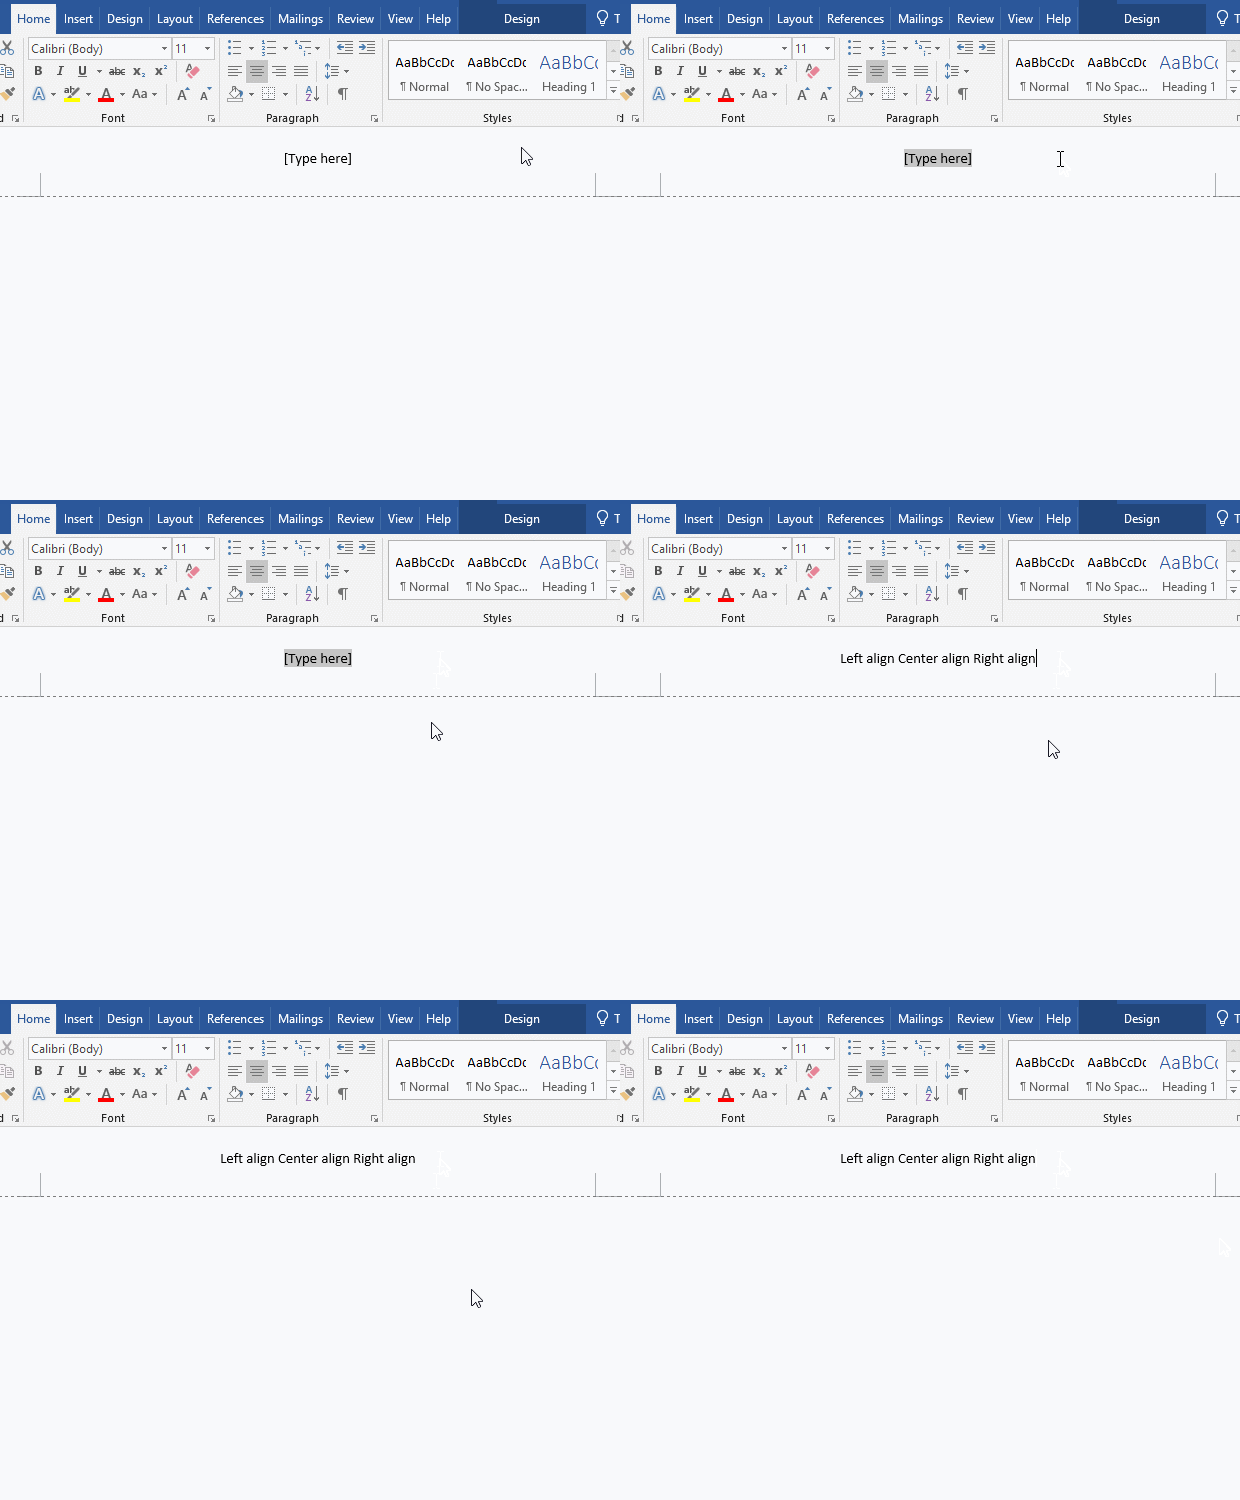
Figure 2
Now use a Tab Stop to align the Left align to the left, Center align to align the center, and Right align to the right.
2. If the Ruler is not displayed, select the View tab, check the Ruler in the Show group in the Ribbon. The demonstration is shown in Figure 3:
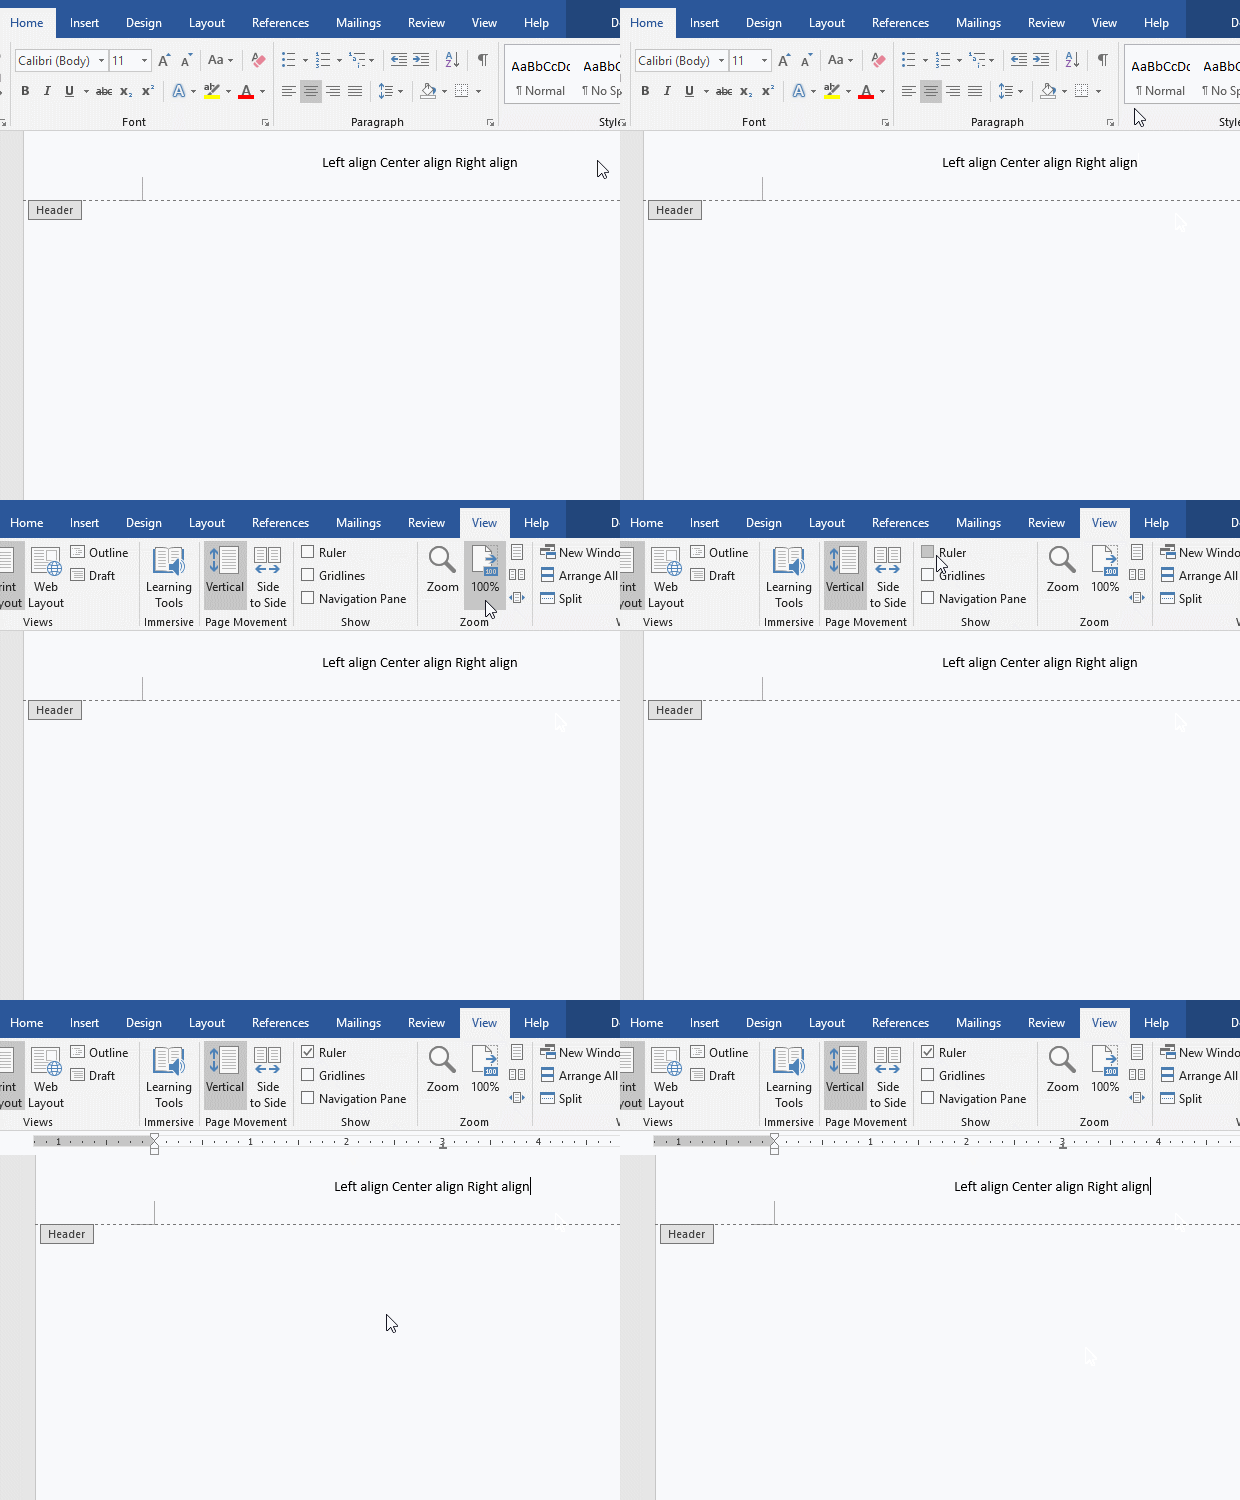
Figure 3
3. Click on the horizontal ruler corresponding to the vertical line on the left side of the header, and an L-shaped Tab Stop appears. Click on the symmetrical position on the right, and another Tab Stop appears. Double-click the Tab Stop in the middle to open the Tabs dialog box. The demonstration is shown in Figure 4:
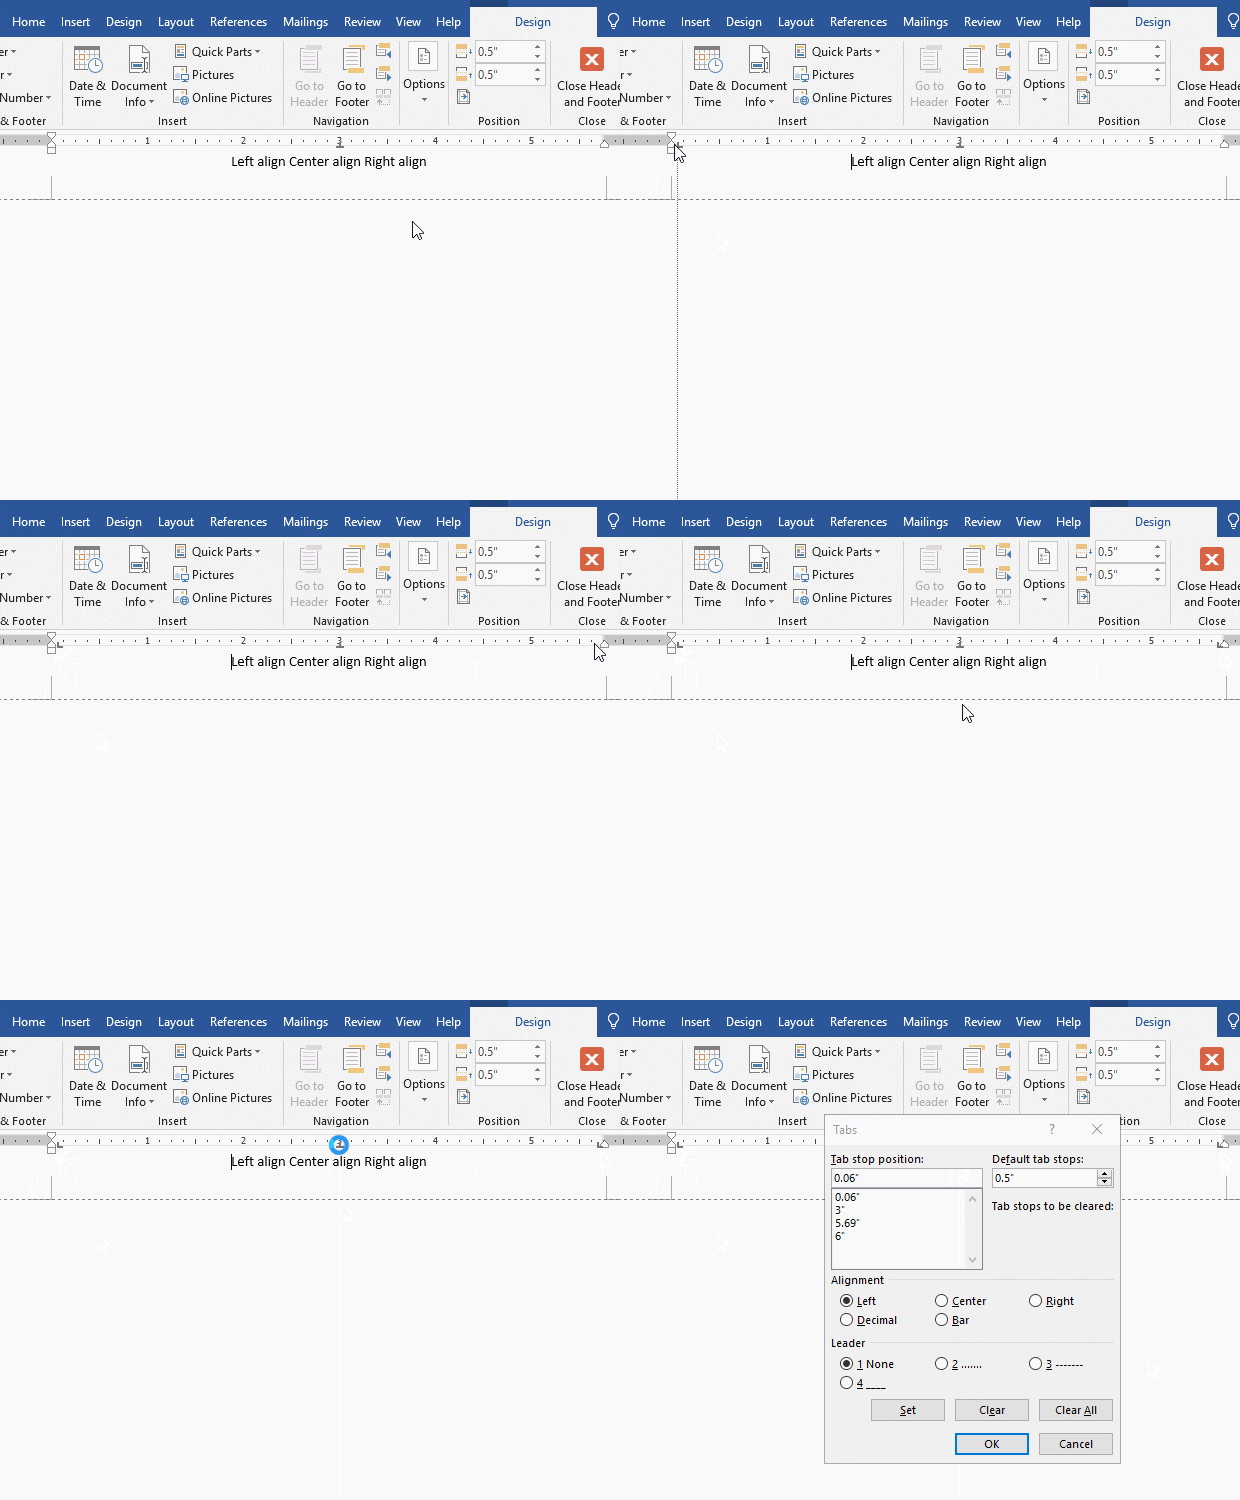
Figure 4
4. Select 5.69 for Tab Stop position, select Right for Alignment, select None for Leader, click OK to close the Tabs dialog box; position the cursor behind Left align, press Tab on your keyboard. There is a certain distance between Left align and Center align. Position the cursor behind Center align, press Tab on the keyboard, and the three parts of text have been aligned to the left, center and right respectively. The demonstration is shown in Figure 5:
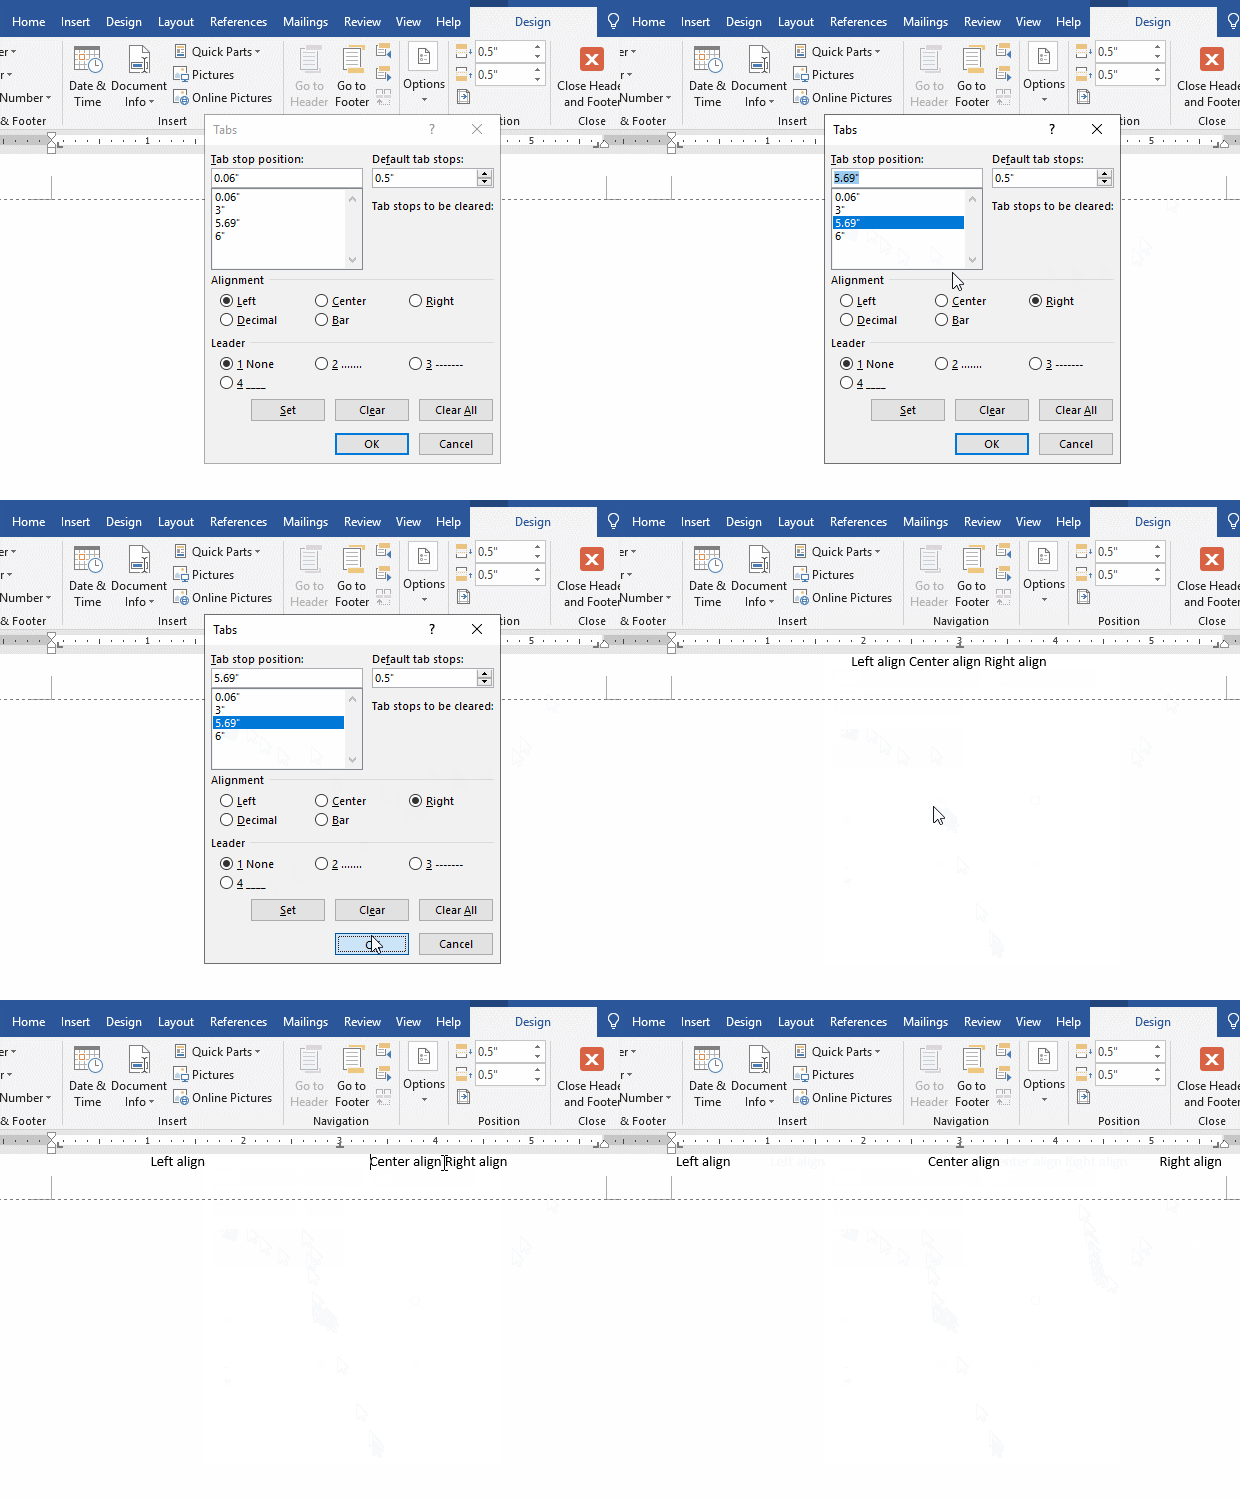
Figure 5
-
Related Reading
- How to delete table lines in Word (one line, remove
- How to sort paragraphs in Word, with sorting them al
- How to add cross symbol and tick mark in Word, with
- How to create and save as a new document in Ms Word,
- How to select multiple photos in Word and why is it
- Find ProPlusww.msi when opening Office(Word/Excel),
- How to set Header and footer in word(13 examples), i
- Word art transform text effect (Follow Path, Warp, A
- How to manage styles in Word, with editing, sorting,
- How to convert PowerPoint to word(4 examples), inclu
- How do I rotate a page 90 degrees in Word, with rota
- Can't print from microsoft Word (6 possible reasons)
