How to insert bullet points in Word (Multiple ways) and quickly create a line list with dots
There are many ways to insert bullet points in Word, such as using Bullets to add them directly to a list, using Insert Symbol to insert a variety of different styles of bullet points, using shortcut keys to directly enter, and using copy and paste. In addition, you can also use AutoCorrect to define shortcut keys for input bullet points.
If you want to add bullet points to multiple items at a time, it is only added for a vertical list by default, not for a row list; but it can be implemented in a table, just create one according to the number of rows and columns of the list; and then use the Bullets to realize it. If you don't need the border, you can remove them.
1. Using Bullets, how to insert bullet points in Word
Select the Home tab, select the list that you want to insert bullet points, click the Bullets icon, and insert bullet points before the selected list; because the bullet point is the default bullet. The operation steps are shown in Figure 1:
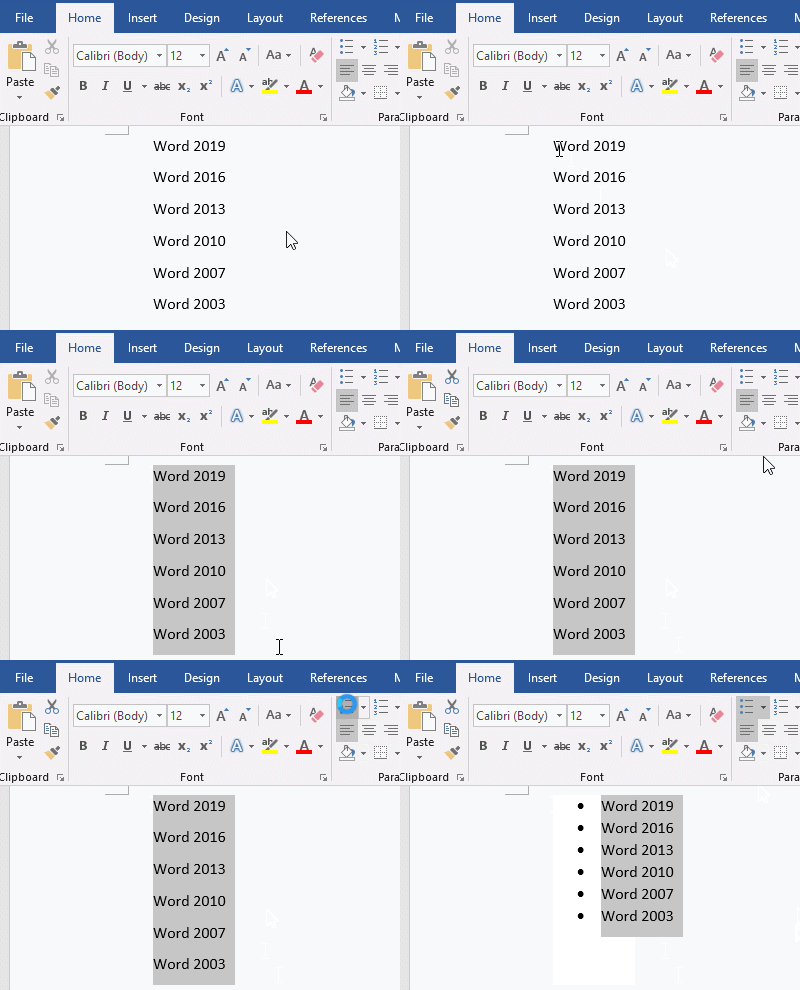
Figure 1
2. Using Insert Symbol, How to insert bullet points in Word
Position the cursor in front of the text where you want to insert a bullet point, select the Insert tab, click the Symbol in the upper right corner of the screen, select More Symbols in the pop-up menu, open the Symbol window, and select Symbols tab. Click the Font drop-down list box, select Webdings in the pop-up menu, select a bullet point, click Insert button to insert a bullet point, click Close to close Symbol window. The operation steps are shown in Figure 2:
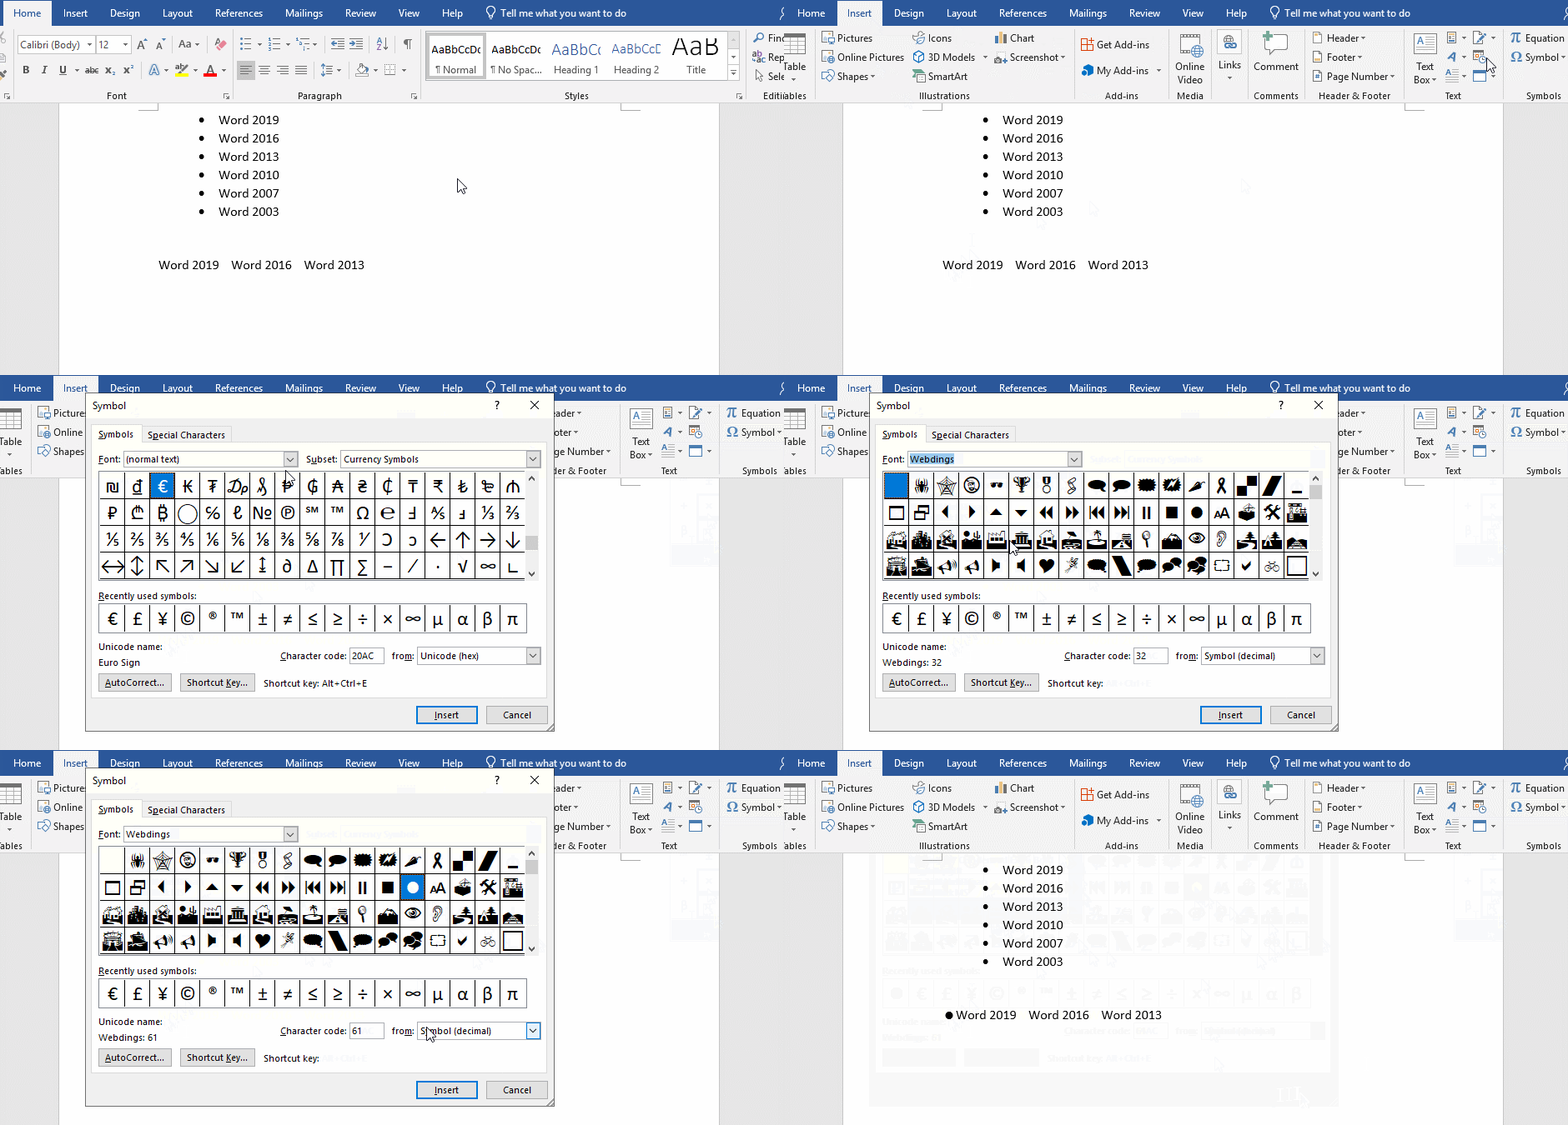
Figure 2
Note: Select Wingdings or Wingdings 2 for Font, and there are some bullet points in different styles.
3. Using shortcut keys, how to put a dot between words in Microsoft Word (Keyboard command for bullet point is Alt + 0149)
Position the cursor between words that you want to put a dot, hold down the Alt key on the keyboard, enter 0149 on the numeric keyboard, release the Alt key, and enter a dot between words. The demonstration is shown in Figure 3:
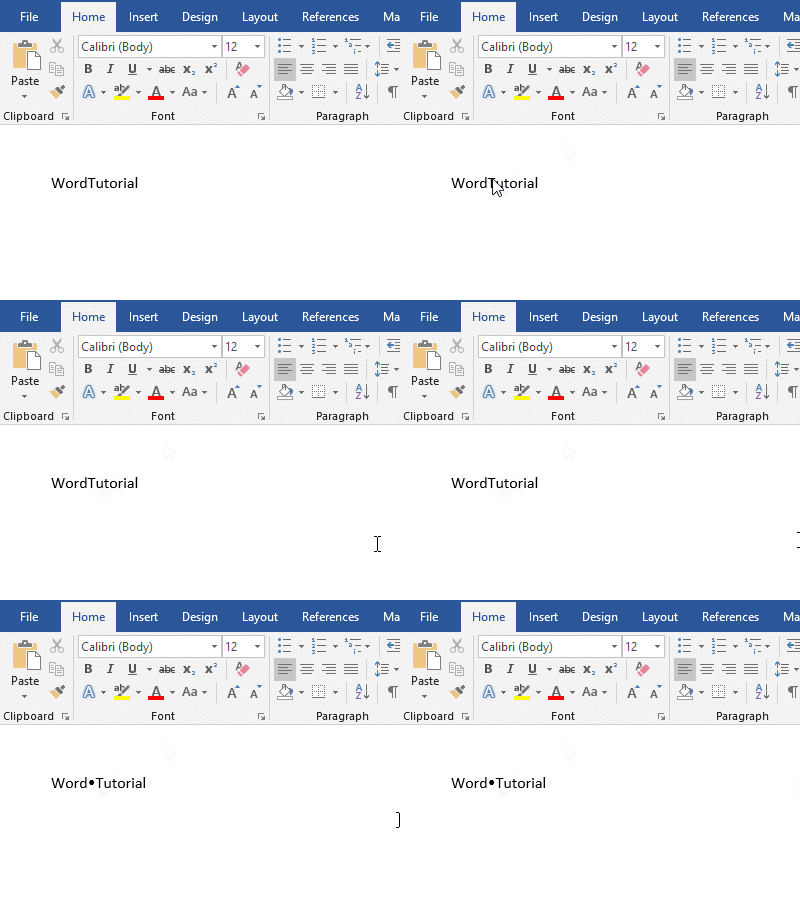
Figure 3
4. Copy and paste bullet points
After inserting or inputting a bullet point, you can copy and paste the bullet points for the remaining text. Select the bullet point you want to copy, press the shortcut key Ctrl + C on your keyboard to copy, position the cursor to the position where you want to enter the bullet point, press Ctrl + V to paste, continue to position the cursor before the remaining text, press Ctrl + V to paste. The demonstration is shown in Figure 4:
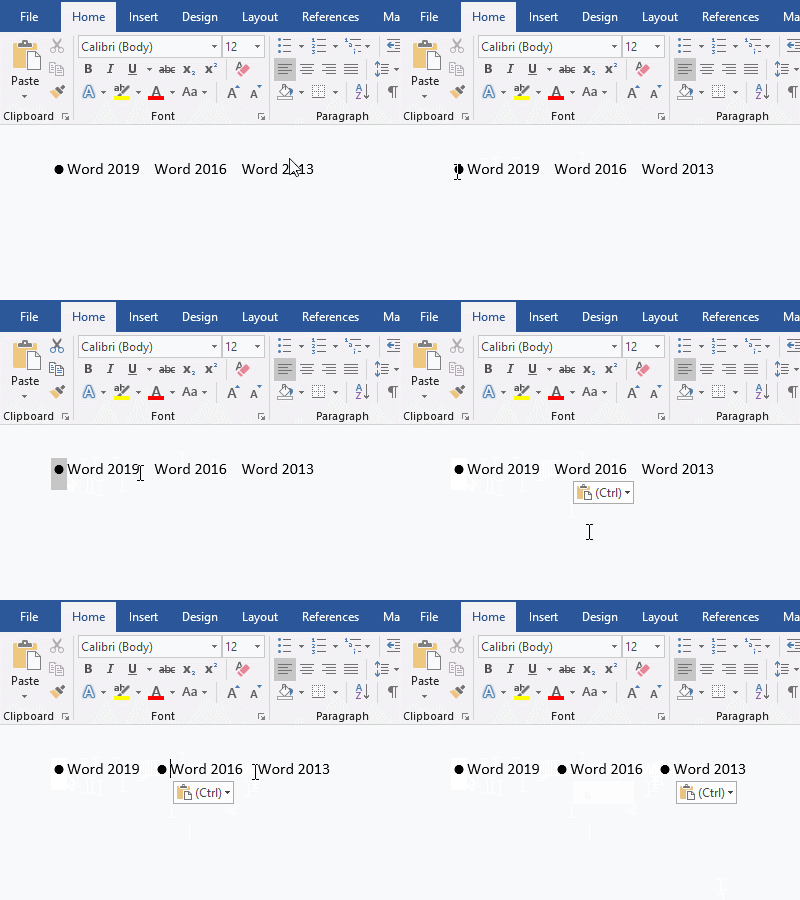
Figure 4
5. Quickly create a line list with bullet points in Word
Position the cursor where you want to create a row list, select the Insert tab, click Table, in the pop-up menu, select the number of rows and columns to create the table according to the number of rows and columns in the list. For example, select three rows and six columns, and then click to create a table. Click the small icon in the upper left corner of the table, select the entire table, select the Home tab, click the Bullets icon, and a bullet is inserted into each cell. The operation steps are shown in Figure 5:
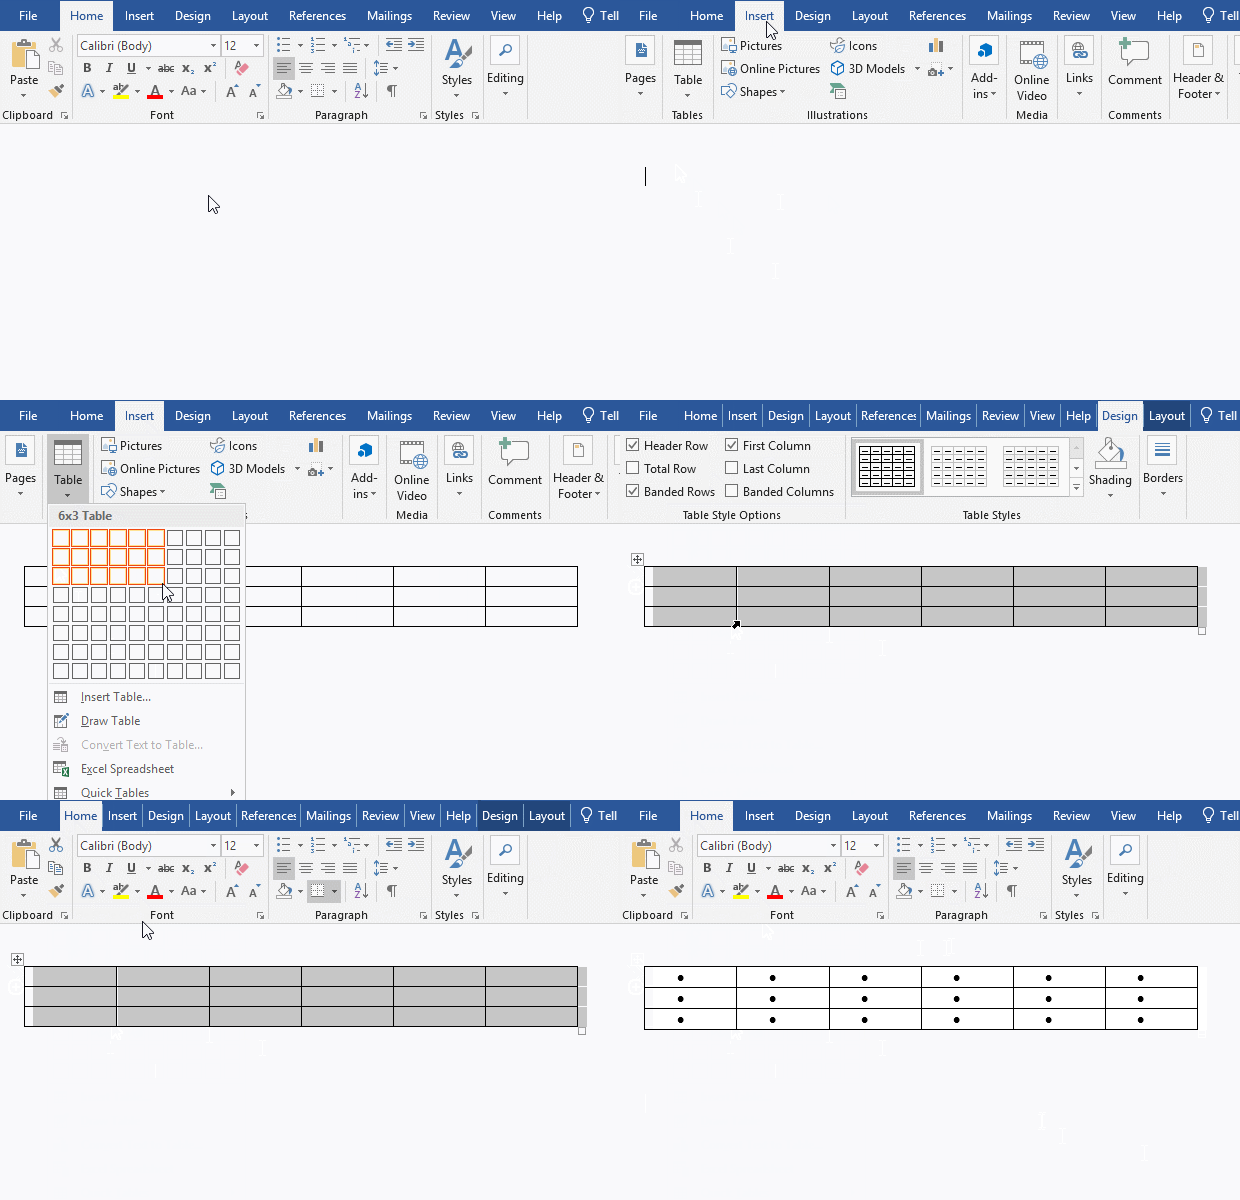
Figure 5
If you don't want the lines of the table, you can remove them. The method is: select the table, click the Down Arrow on the right side of the Borders icon, and select No Border in the pop-up menu, and all the lines of the table will be removed. The demonstration is shown in Figure 6:
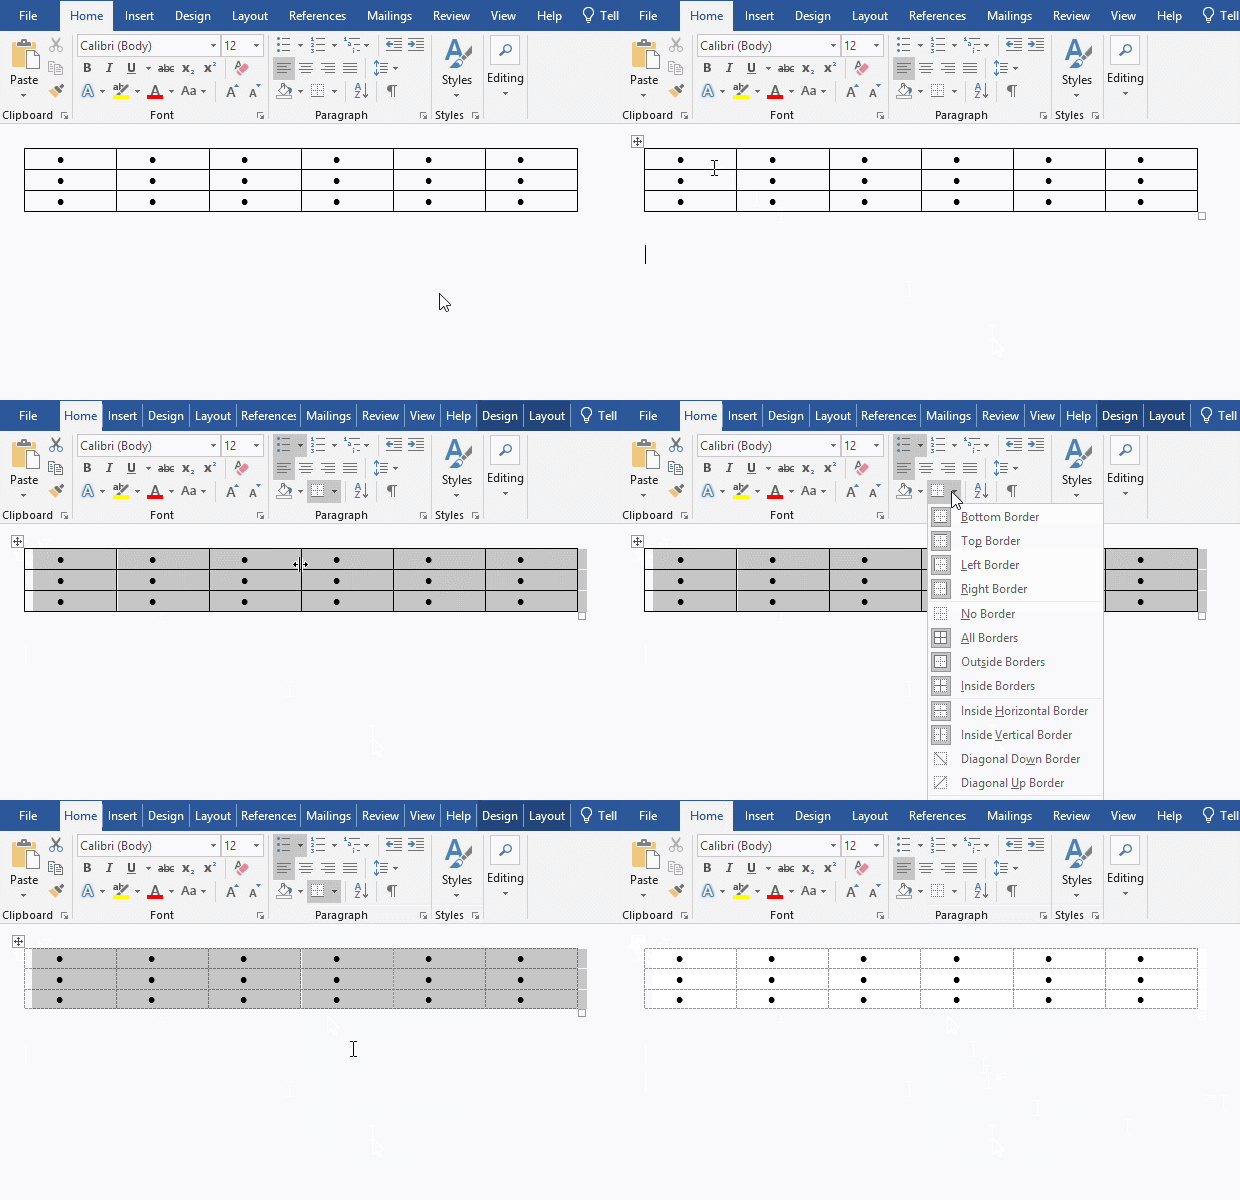
Figure 6
Note: If the space between the bullet point and the text does not meet the requirements and needs to be adjusted, please refer to the article "How to insert bullets in Word, with adjusting spacing, horizontal bullets and changing default type".
-
Related Reading
- How to delete table lines in Word (one line, remove
- How to add cross symbol and tick mark in Word, with
- How to create and save as a new document in Ms Word,
- How to select multiple photos in Word and why is it
- Find ProPlusww.msi when opening Office(Word/Excel),
- How to set Header and footer in word(13 examples), i
- Word art transform text effect (Follow Path, Warp, A
- How to convert PowerPoint to word(4 examples), inclu
- How do I rotate a page 90 degrees in Word, with rota
- Can't print from microsoft Word (6 possible reasons)
- How to set default Printer in Microsoft Word when se
- How to change MS Word autorecover file location and
